本文最后更新于 2024-03-22T23:34:06+00:00
由于个人需要一个可随机生成 [a, b] 之间的正整数,用于记默写英语单词,所以自己手撸了一下,练练技术
完整技术栈:vue3 + vite + element-plus + tailwindcss + typescript + headlessui + heroicons + pinia + vue-router
VScode 插件(可选)
工欲善其事,必先利其器~
推荐一些我在用的插件
Vue - Official - Visual Studio Marketplace:开启分栏好用
Vue VSCode Snippets - Visual Studio Marketplace:初始化 .vue 文件很方便
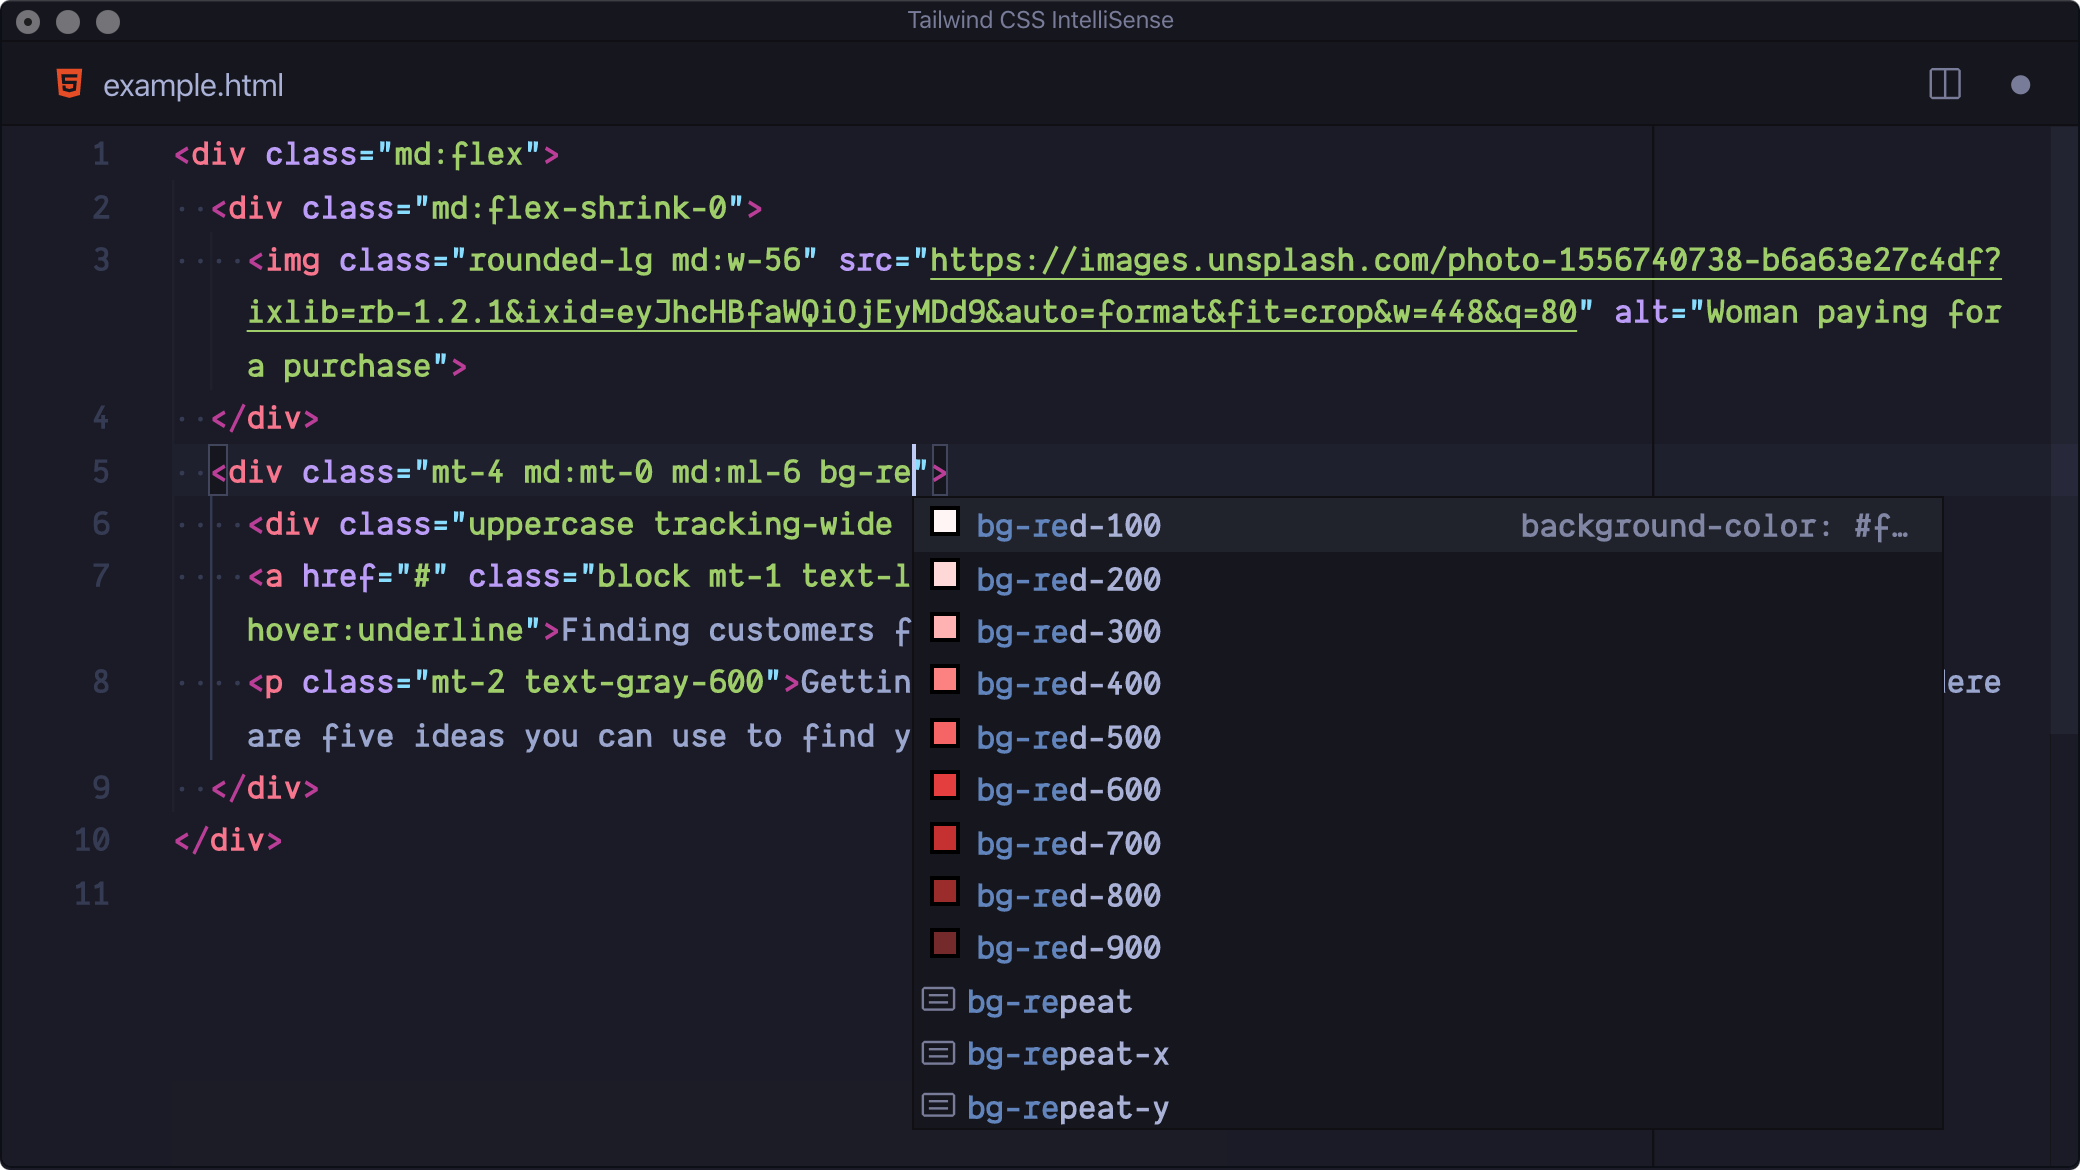
Tailwind CSS IntelliSense - Visual Studio Marketplace:使用 tailwindcss 必备,写类名空格可唤起提示
VScode 配置(可选)
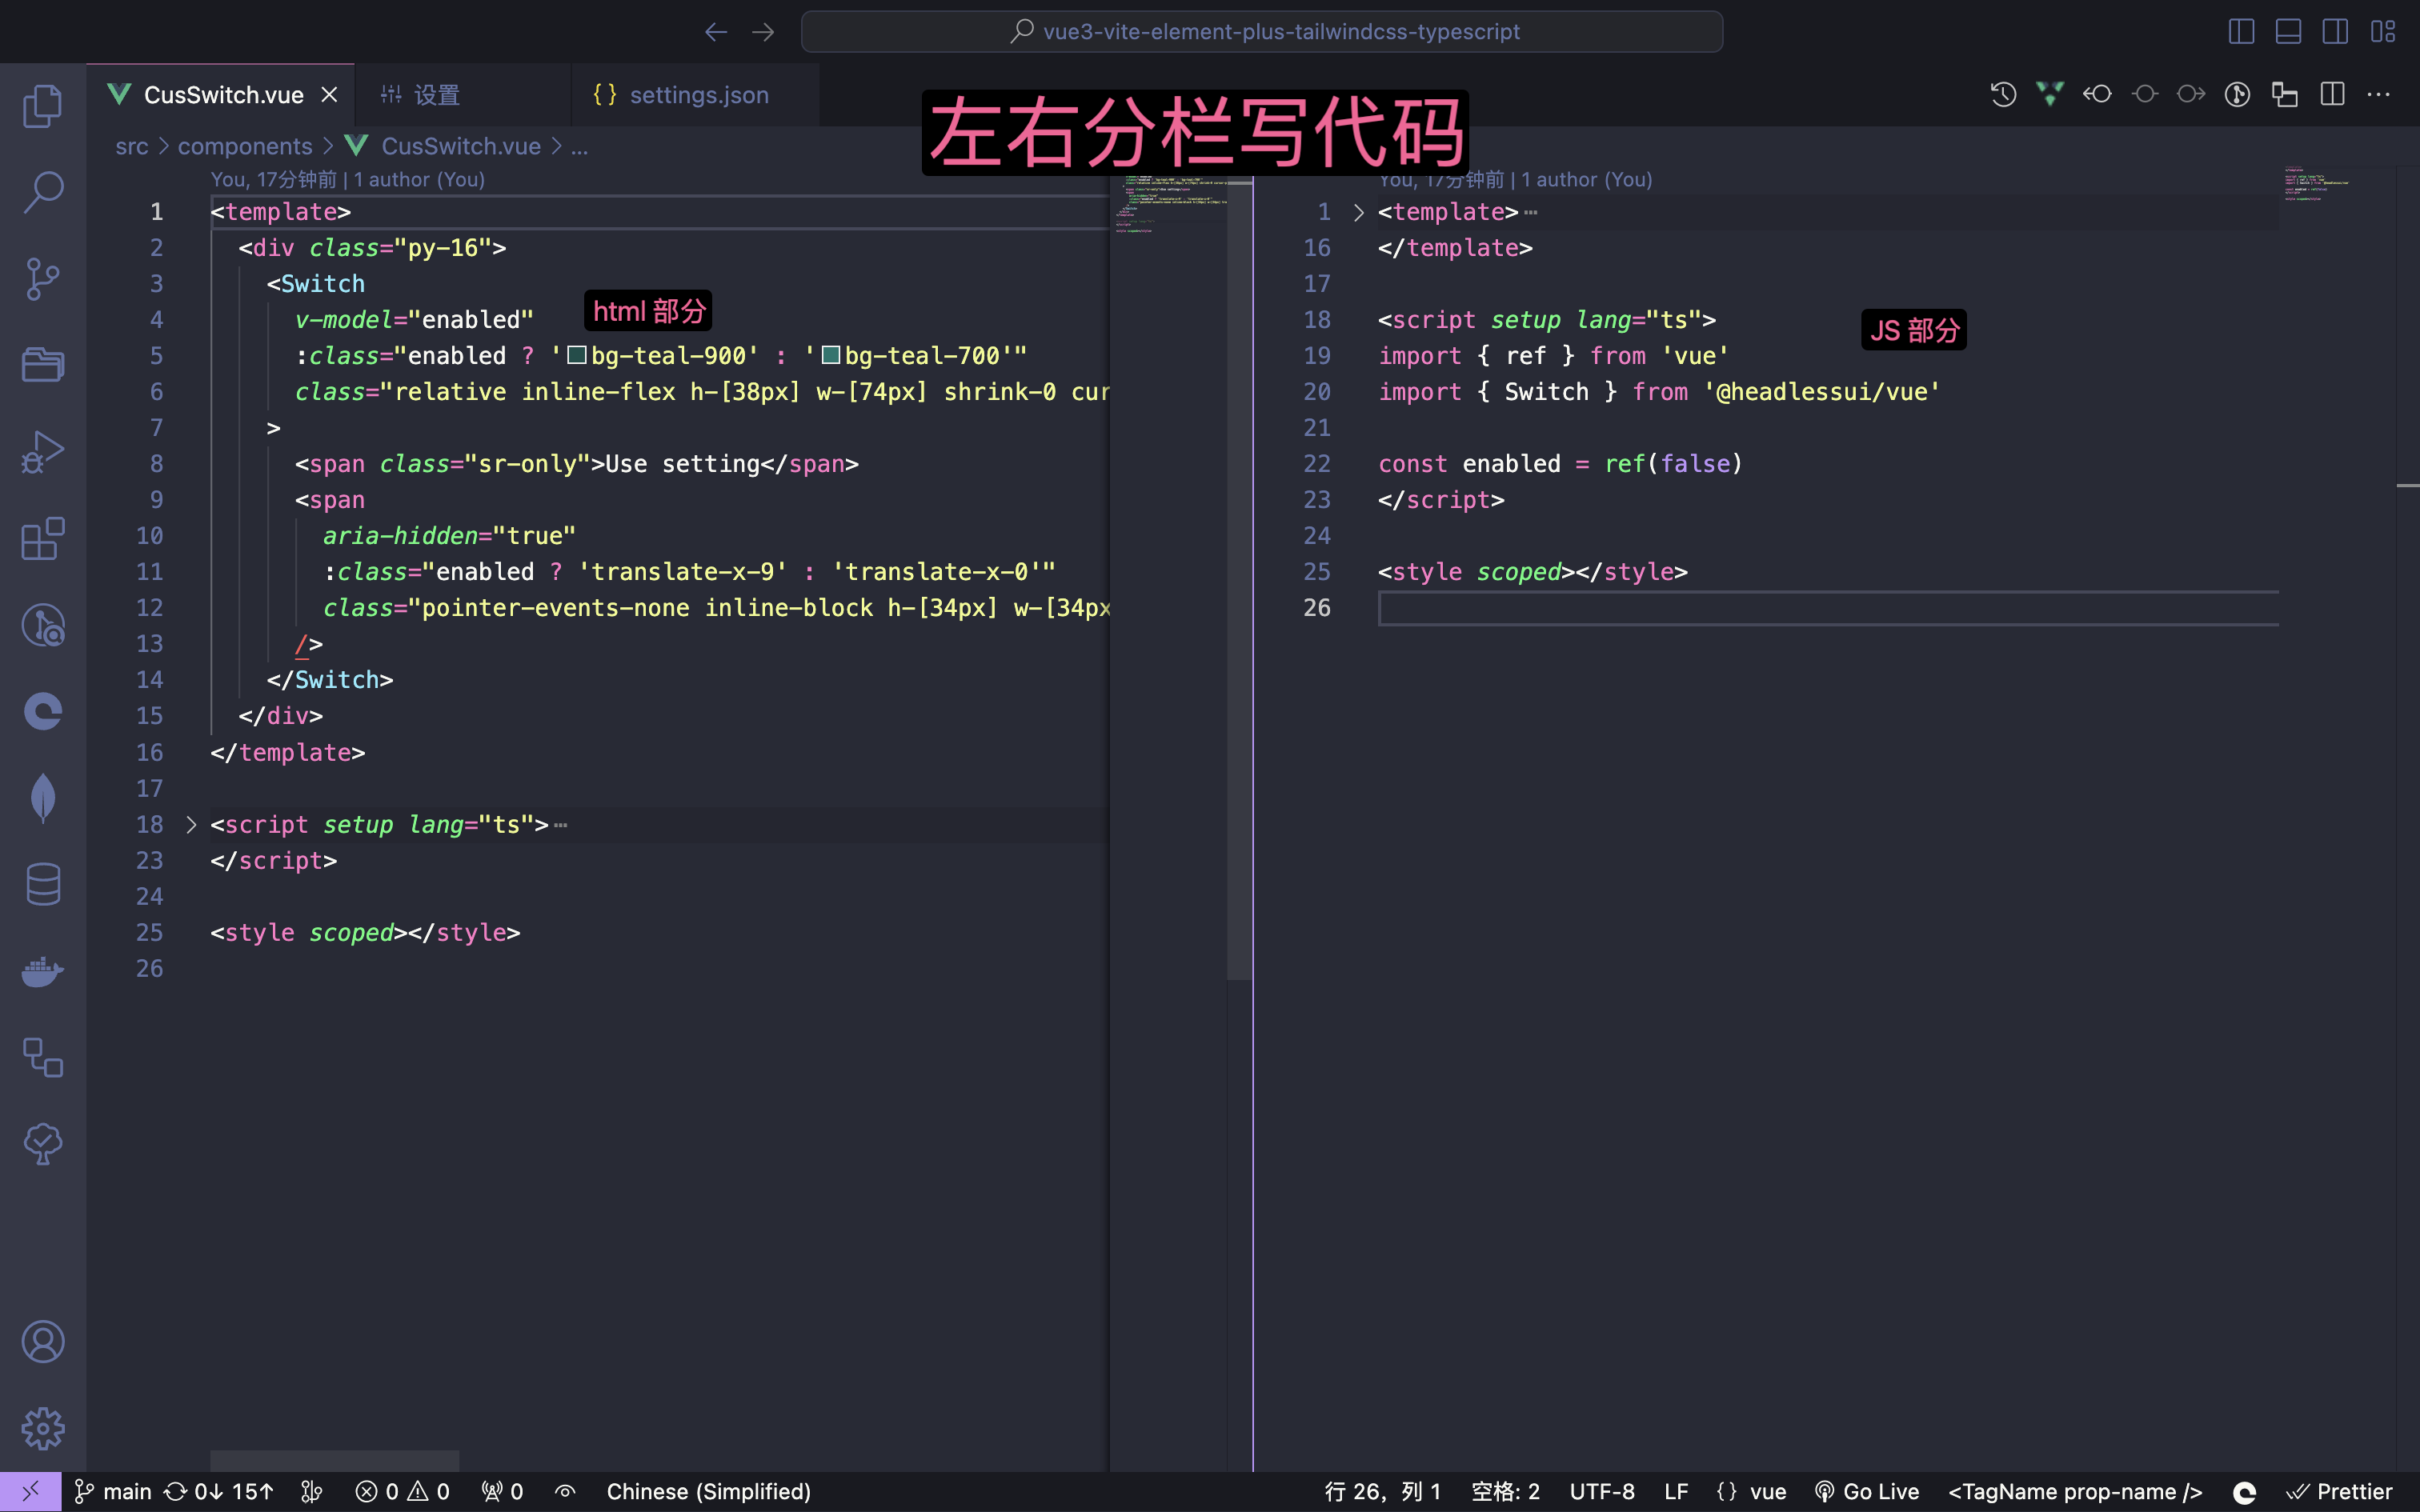
开启左右分栏功能(默认是关闭的)
左边展开 html、右边展开 js
- 先安装 VScode 插件:Vue - Official
- 打开 VScode 的设置,mac 快捷键:
command + ,
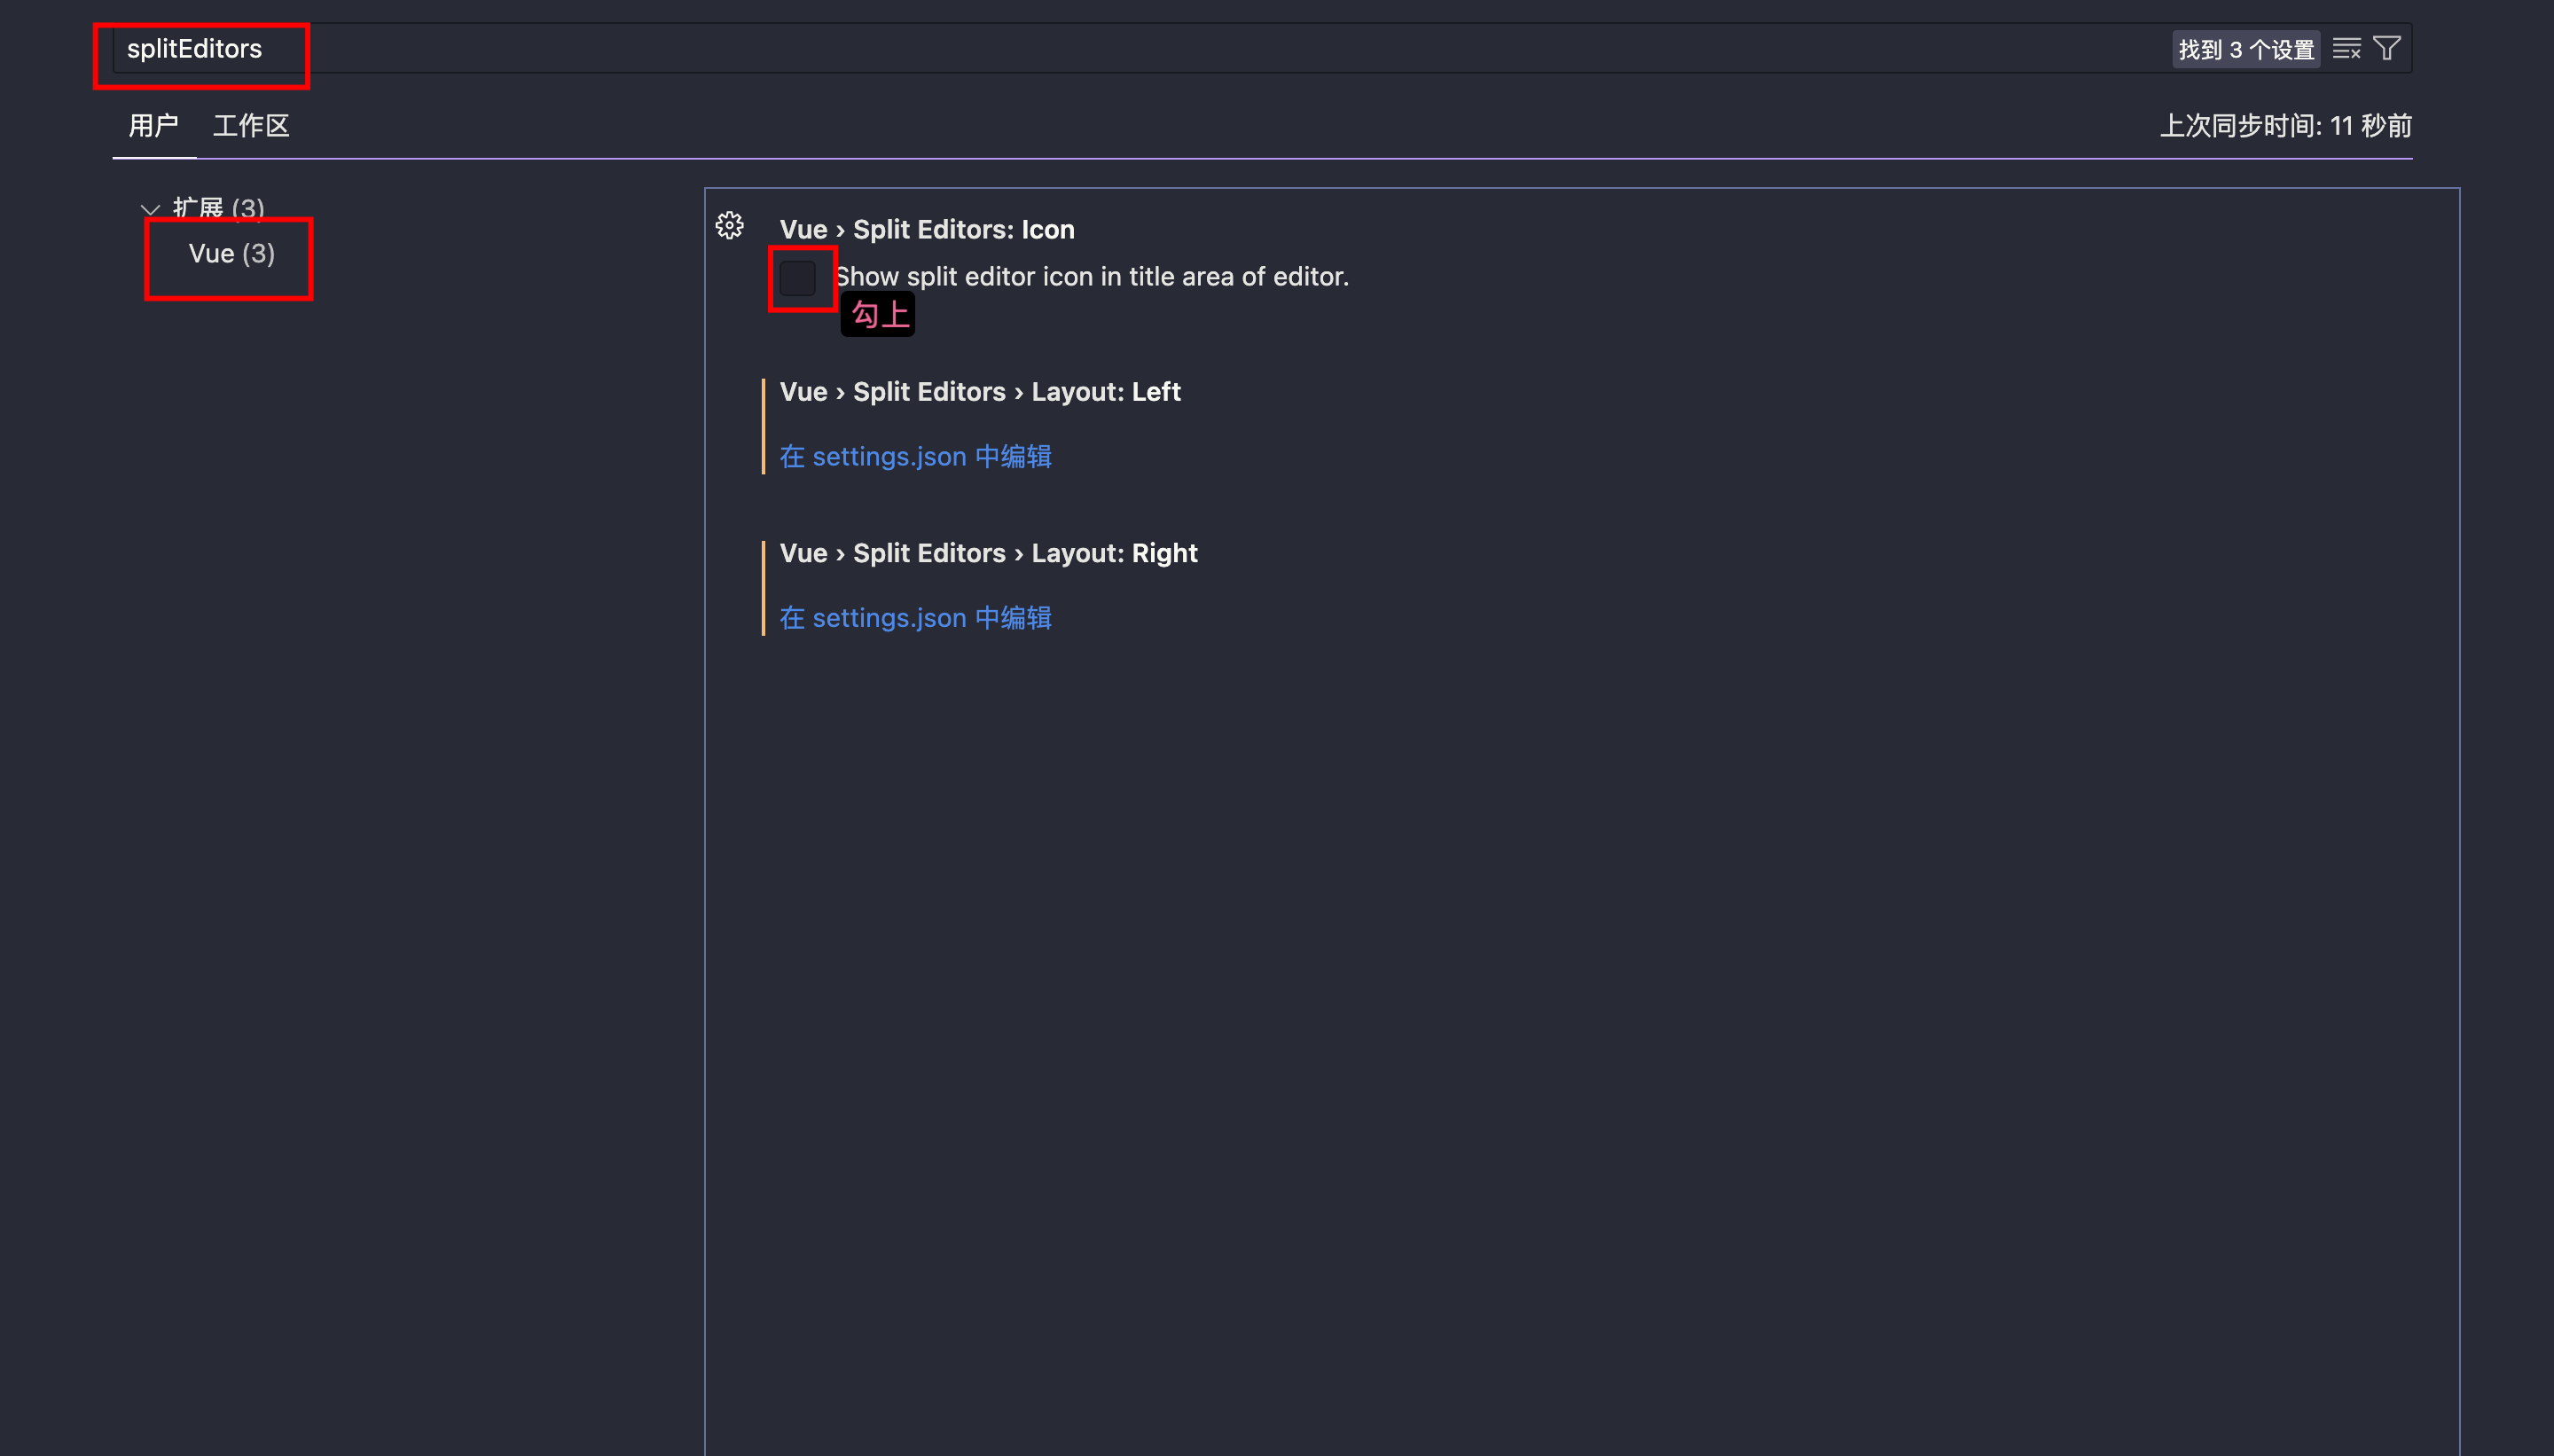
- 搜索关键词:
splitEditors
- 开启分栏功能
- 个性化配置左右栏:默认左侧 js、右侧 html,但我就喜欢左侧 html、右侧 js
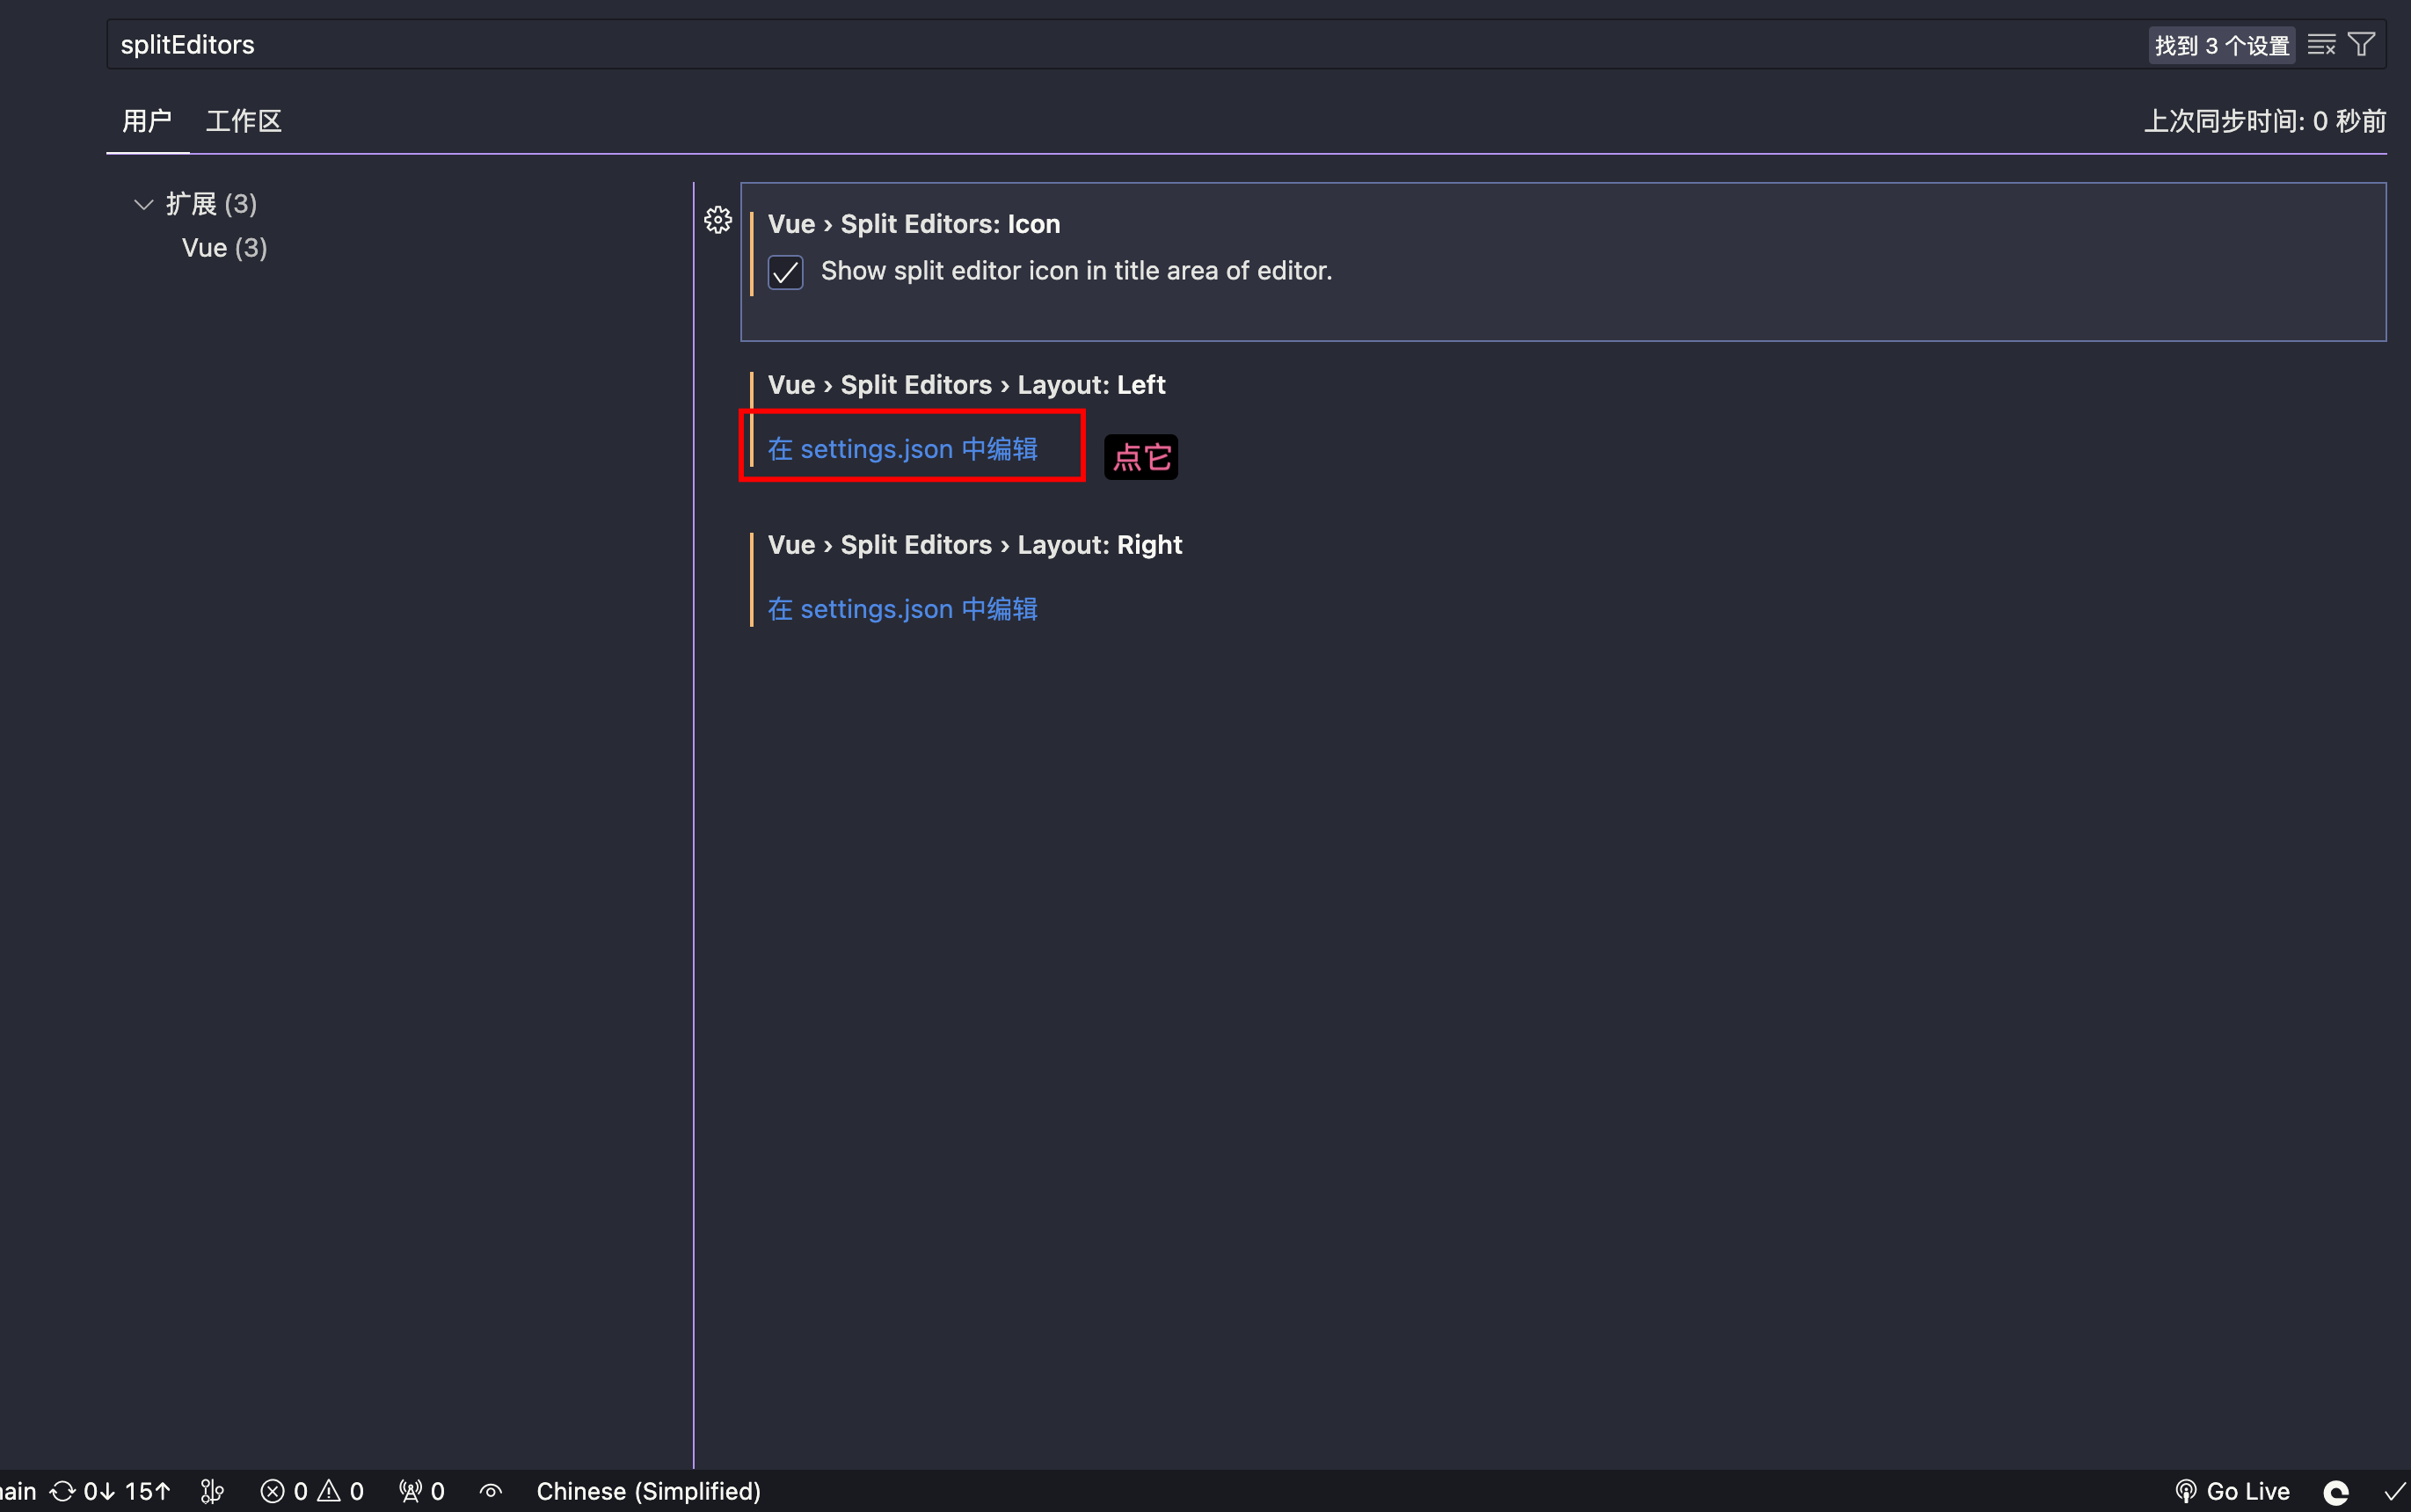
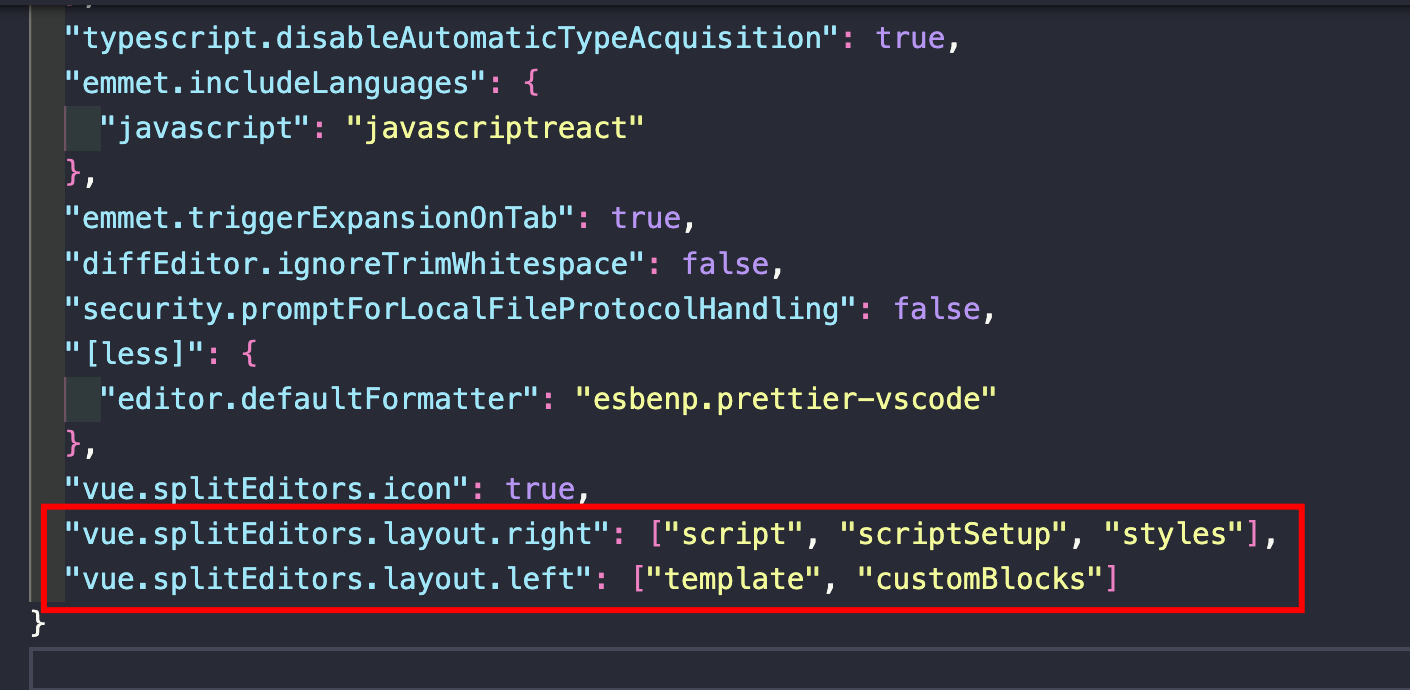
- 删除之前的,填入下面的这两个
1
2
| "vue.splitEditors.layout.right": ["script", "scriptSetup", "styles"],
"vue.splitEditors.layout.left": ["template", "customBlocks"]
|
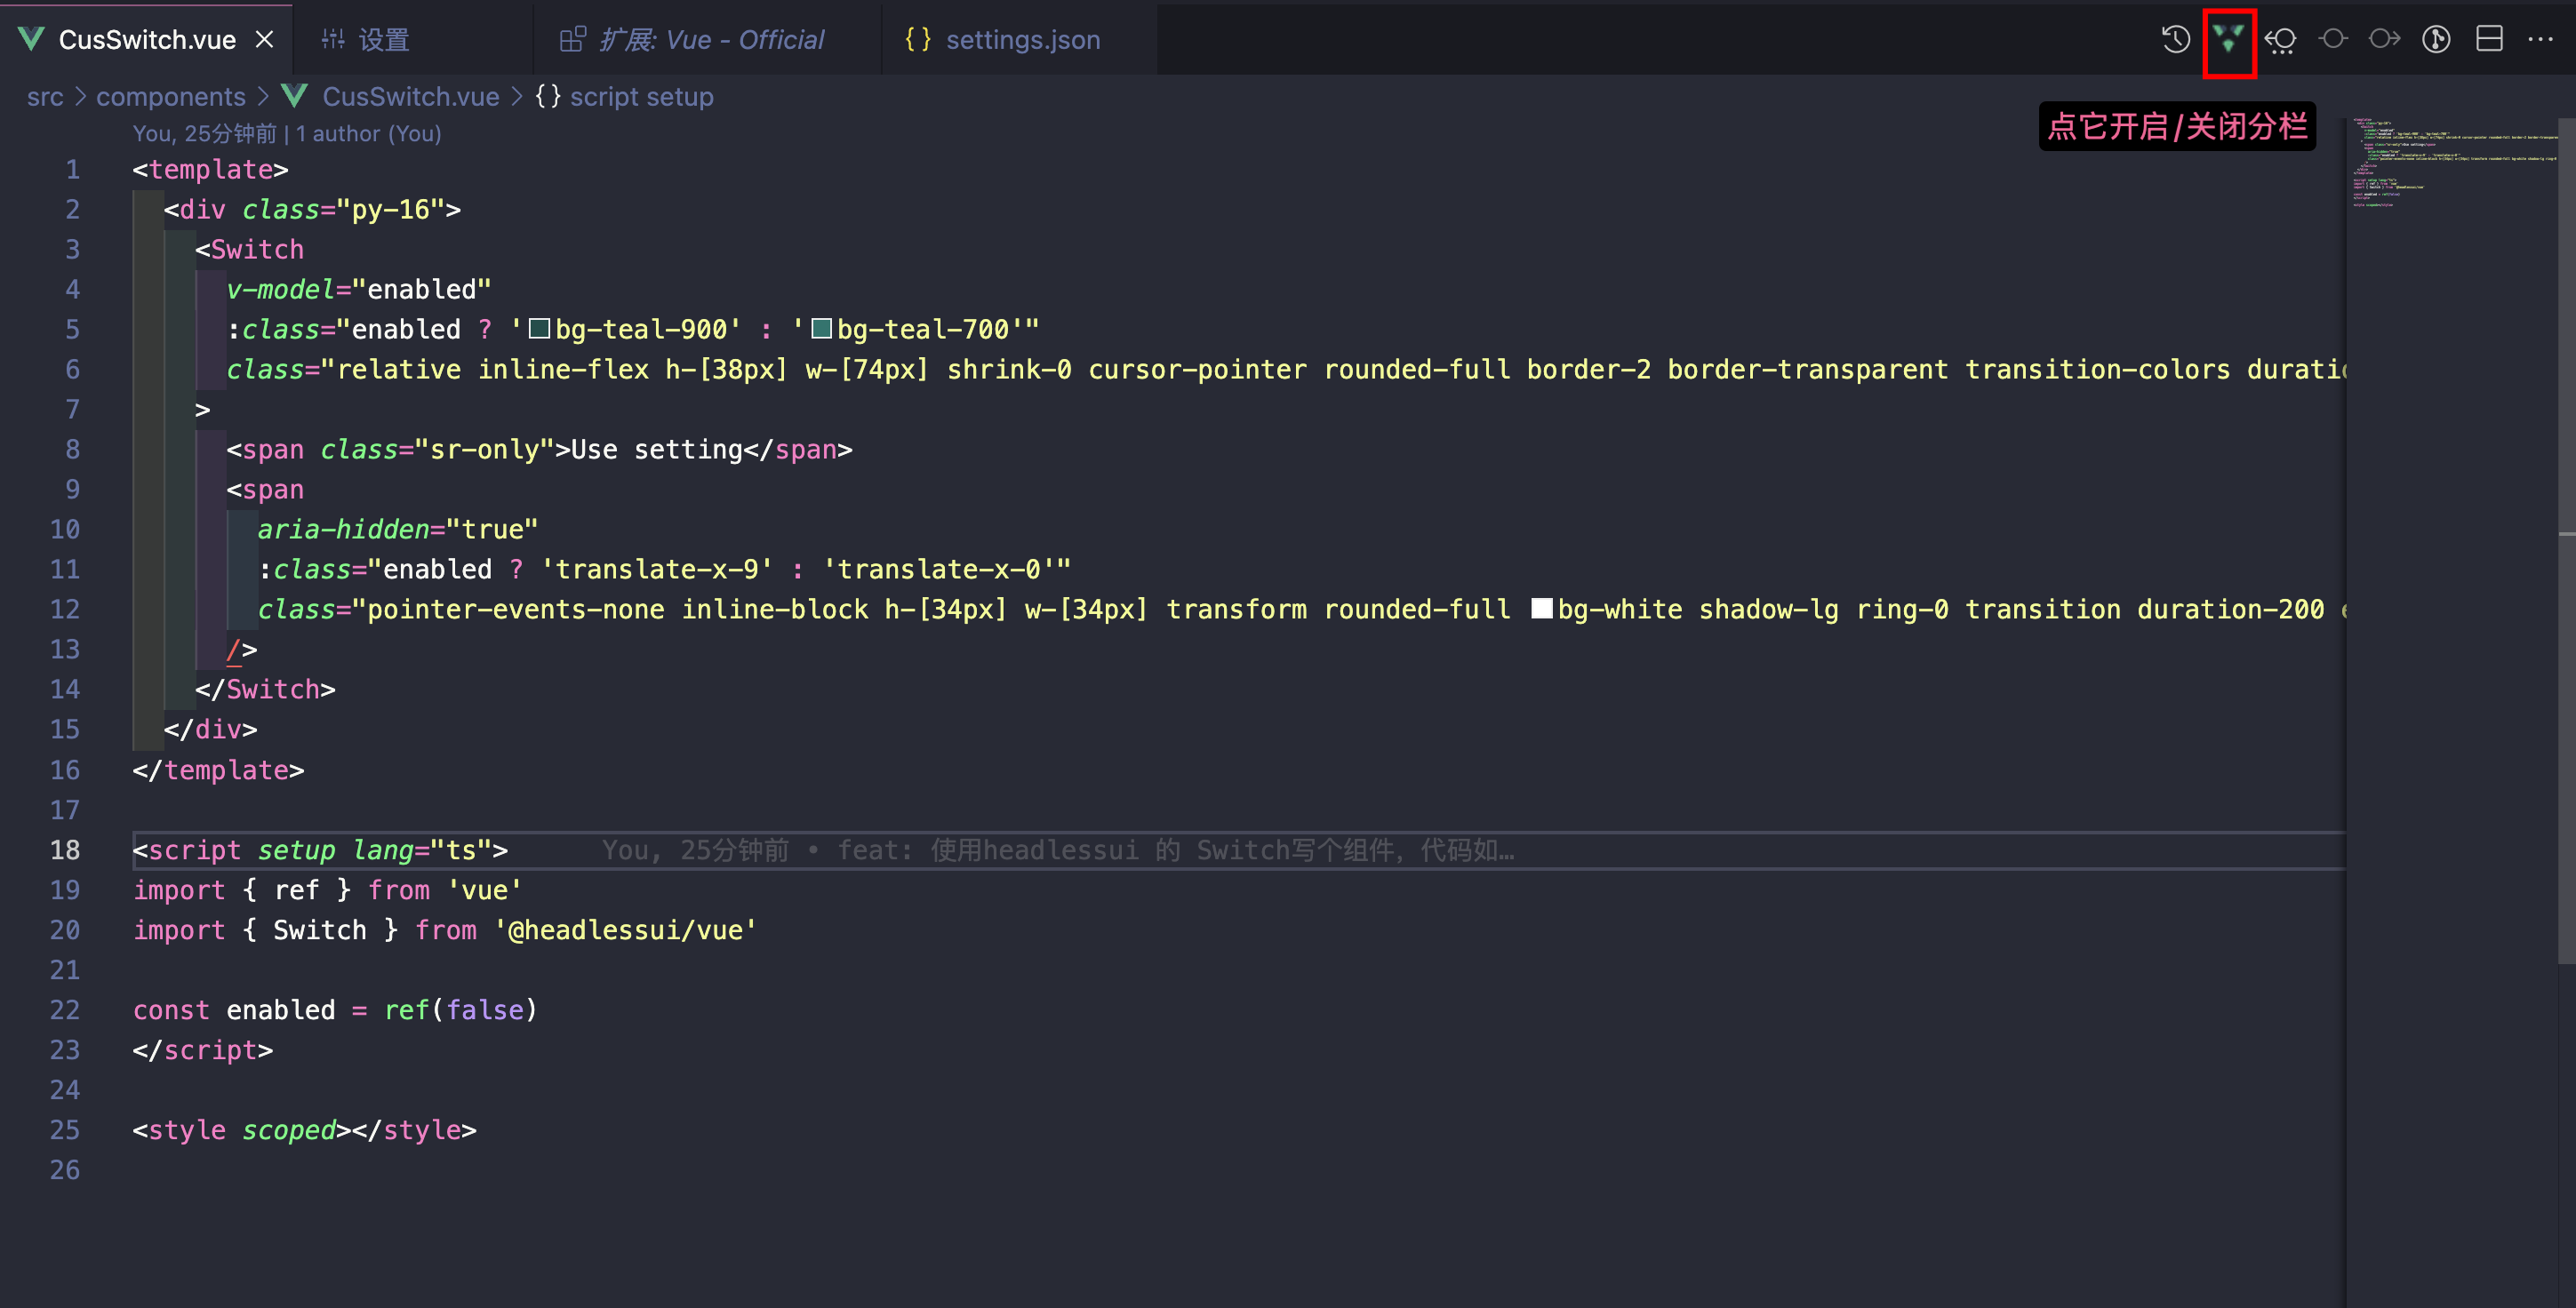
- 保存一下,然后后回到任意
.vue文件,右上角就有一个图标了
初始化
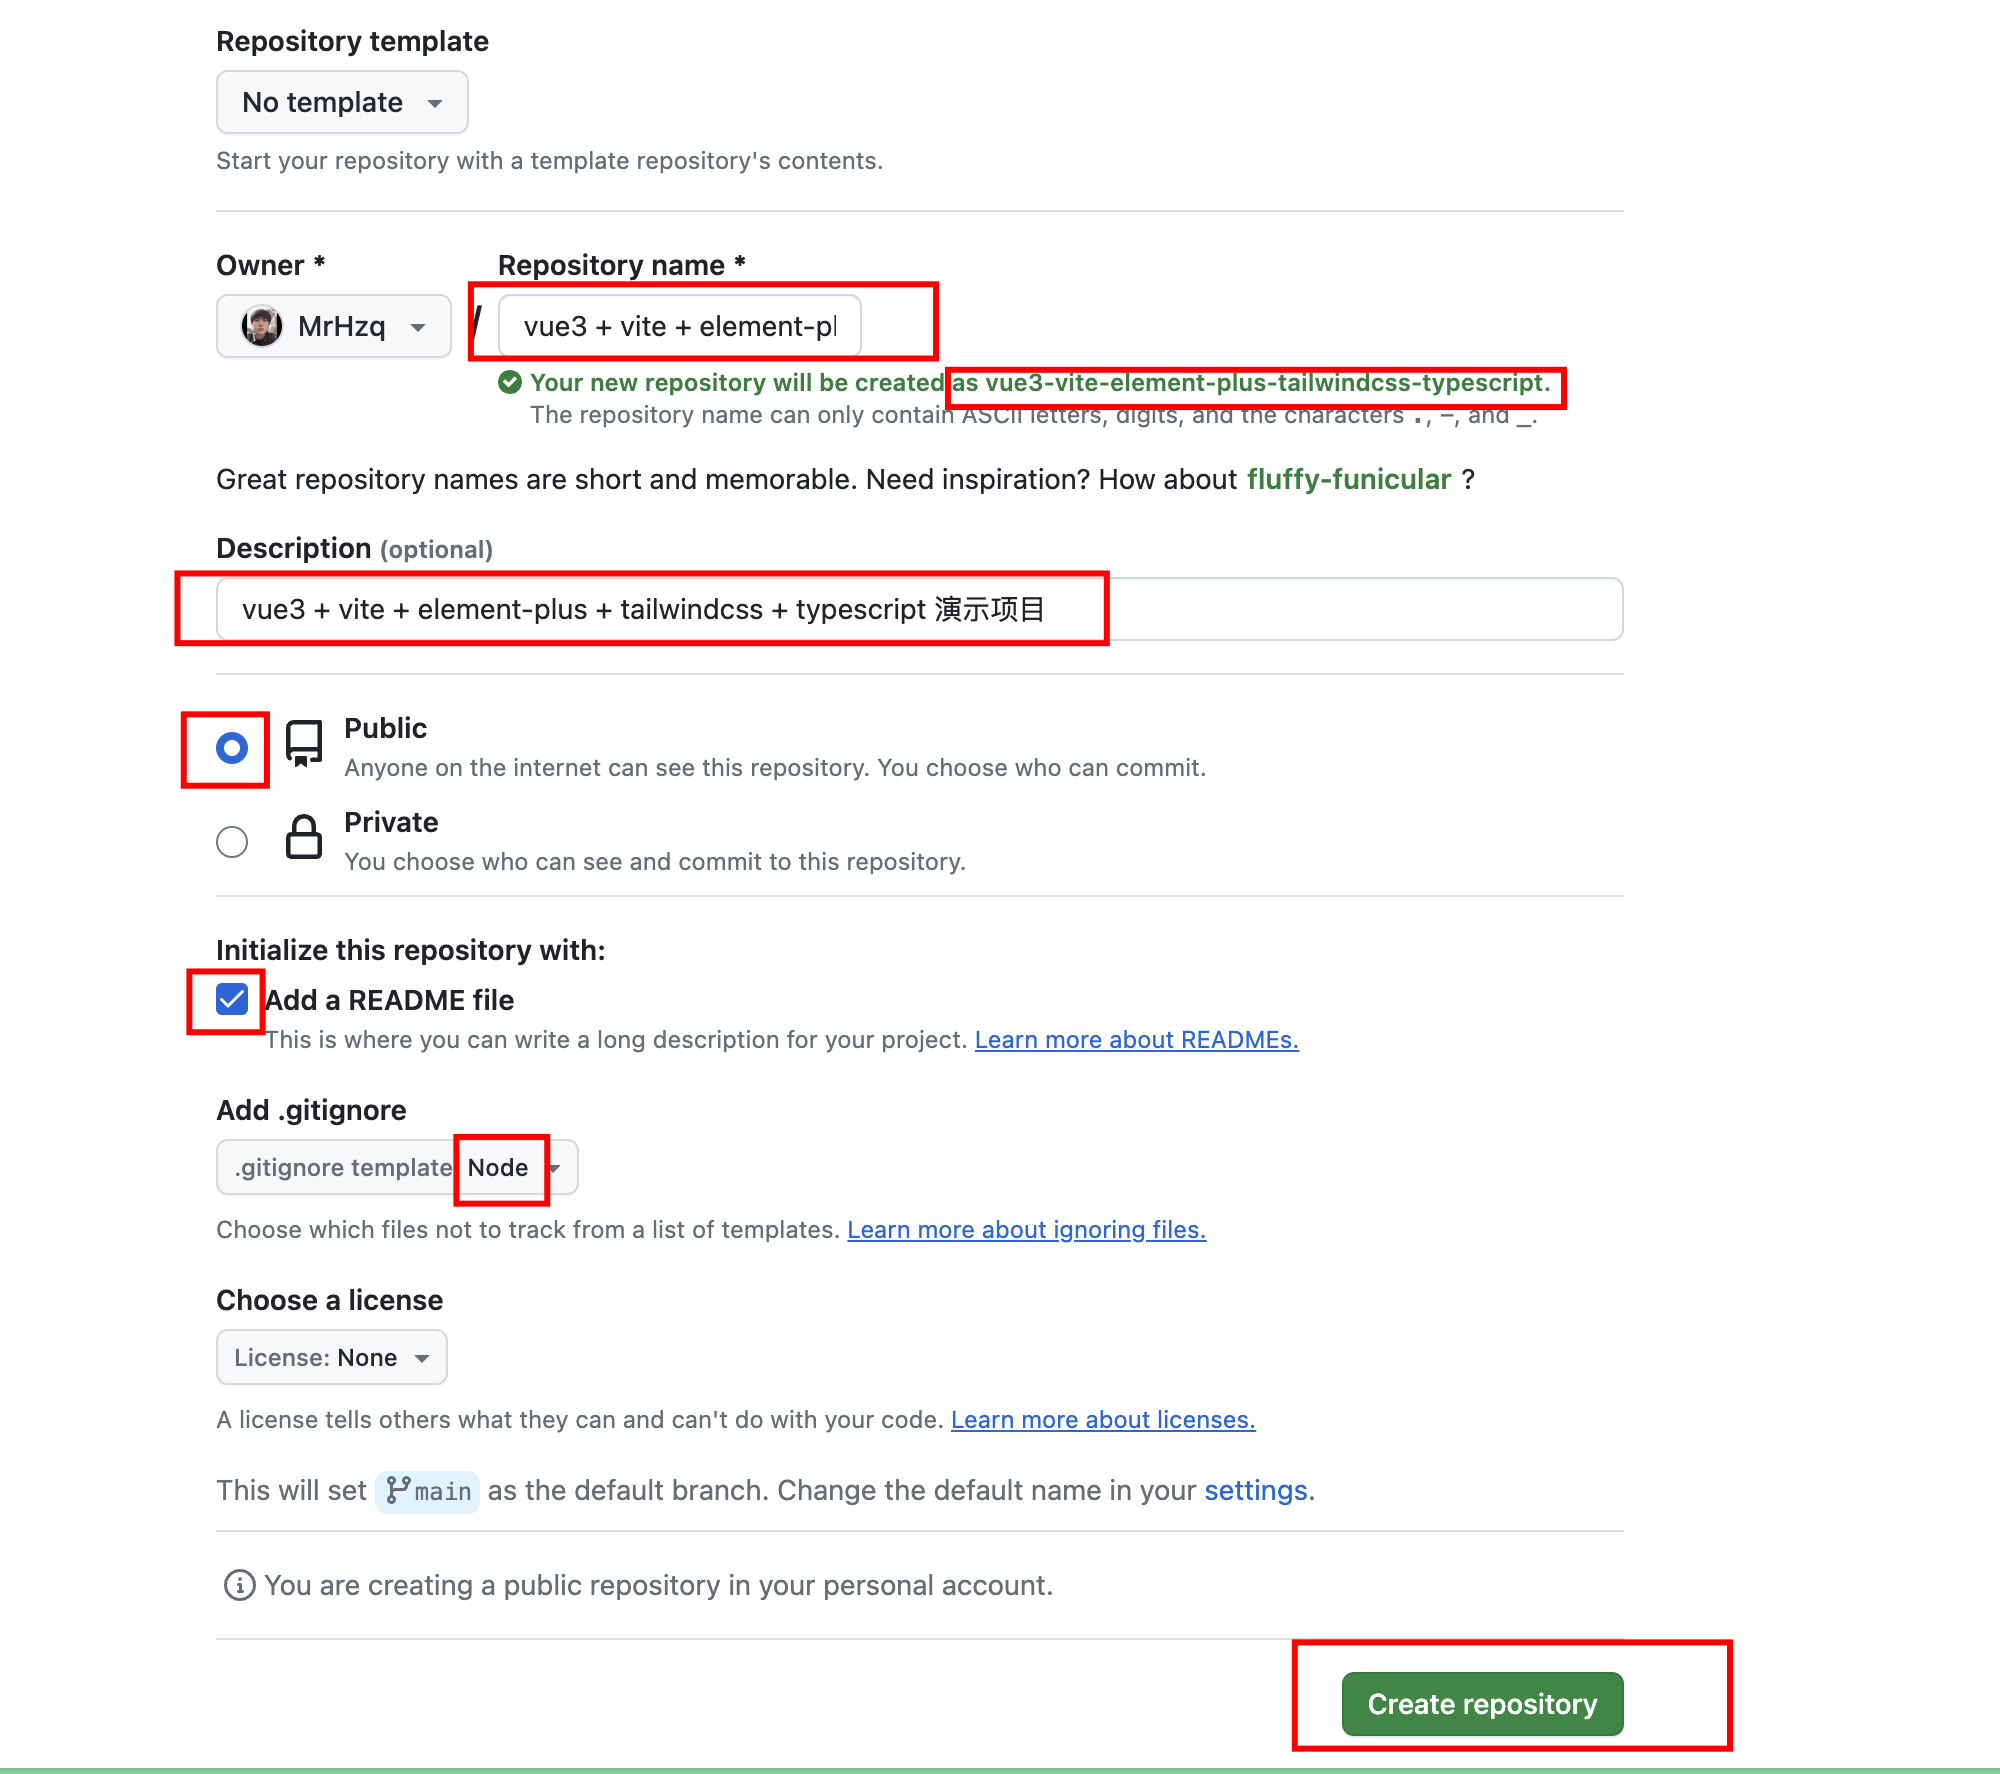
- 先在 github 上面创建项目
- 拉取项目到本地:
git clone xxxxx
- 先说一下我的环境
1
2
3
4
5
|
node -v
npm -v
pnpm -v
|
- 进入项目,按照vue 官方文档初始化项目,下面三个命令任选其一
1
2
3
4
| pnpm create vue@latest
npm create vue@latest
yarn create vue@latest
|
我的创建命令选项
1
2
3
4
5
6
7
8
9
10
11
12
13
14
15
16
| ✔ 请输入项目名称:/
? 目标文件夹 "/" 非空,是否覆盖? › 否 / 是
? 请输入包名称: › -
? 是否使用 TypeScript 语法? › 否 / 是
? 是否启用 JSX 支持? › 否 / 是
? 是否引入 Vue Router 进行单页面应用开发? › 否 / 是
? 是否引入 Pinia 用于状态管理? › 否 / 是
? 是否引入 Vitest 用于单元测试? › 否 / 是
? 是否要引入一款端到端(End to End)测试工具? › - 使用箭头切换按Enter确认。
❯ 不需要
Cypress
Nightwatch
Playwright
? 是否引入 ESLint 用于代码质量检测? › 否 / 是
? 是否引入 Prettier 用于代码格式化? › 否 / 是
? Add Vue DevTools extension for debugging? (experimental) › 否 / 是
|
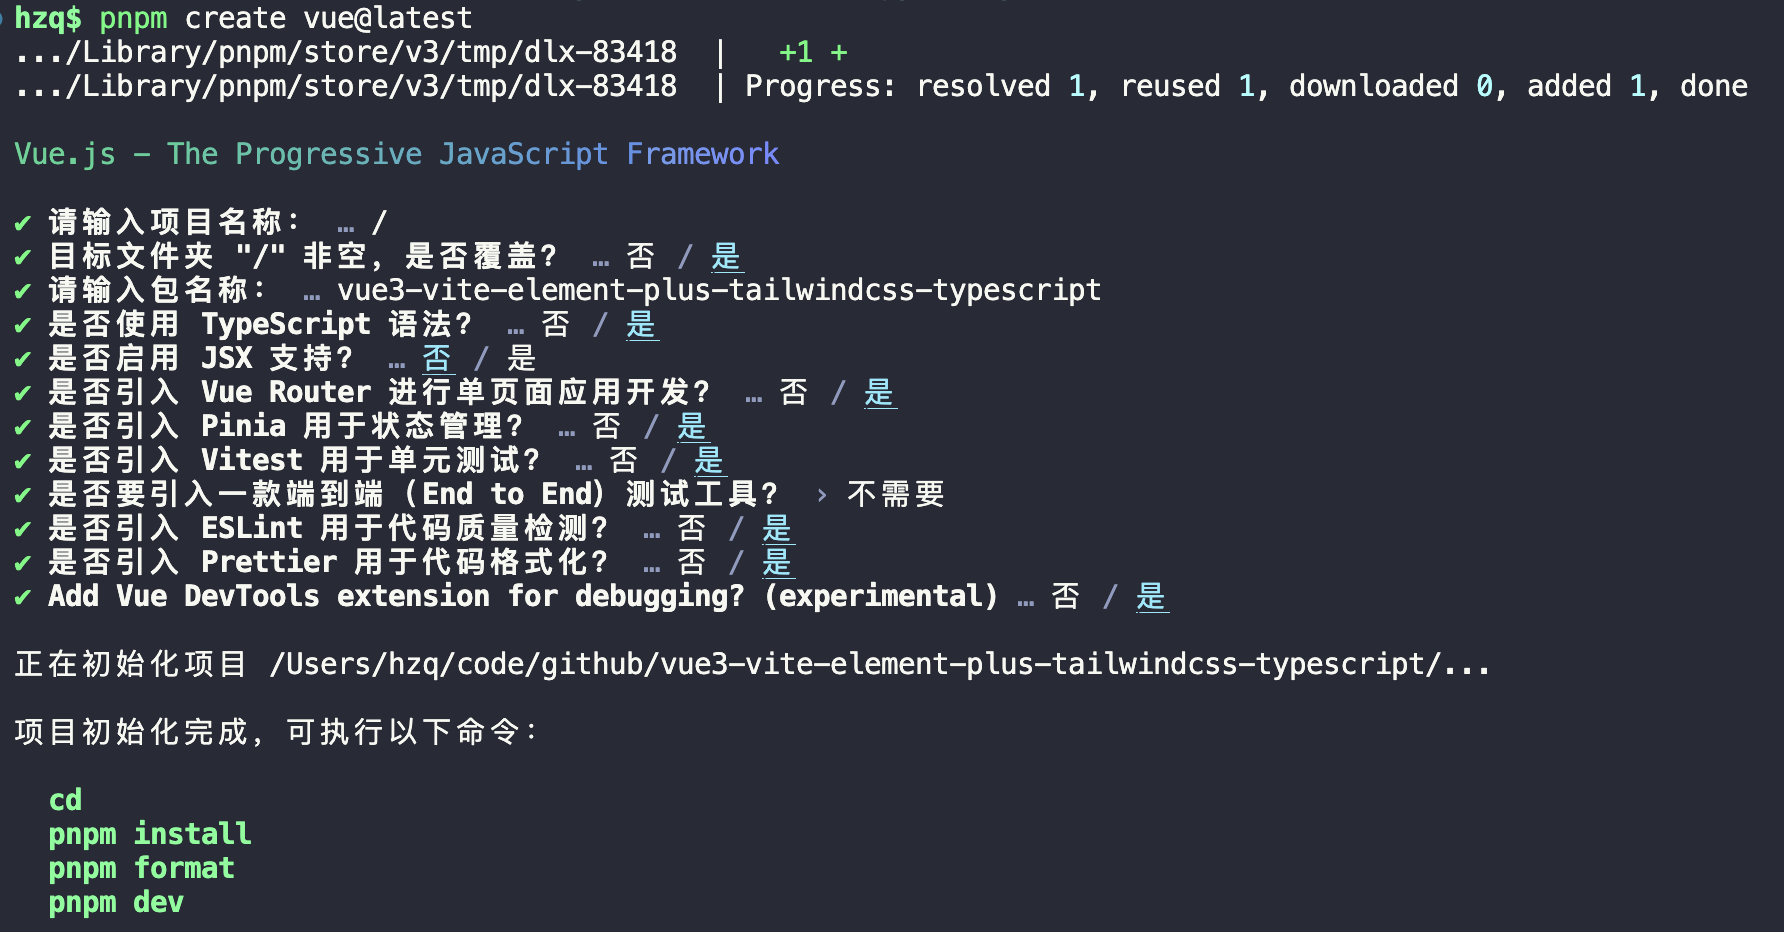
- 项目创建完毕后, 先将代码提交一下
- 然后按照提示运行一遍命令
1
| pnpm install && pnpm format && pnpm dev
|
前两个没啥问题,最后一个pnpm dev报错(因为我一直开着“魔法”的,关了就能成功)
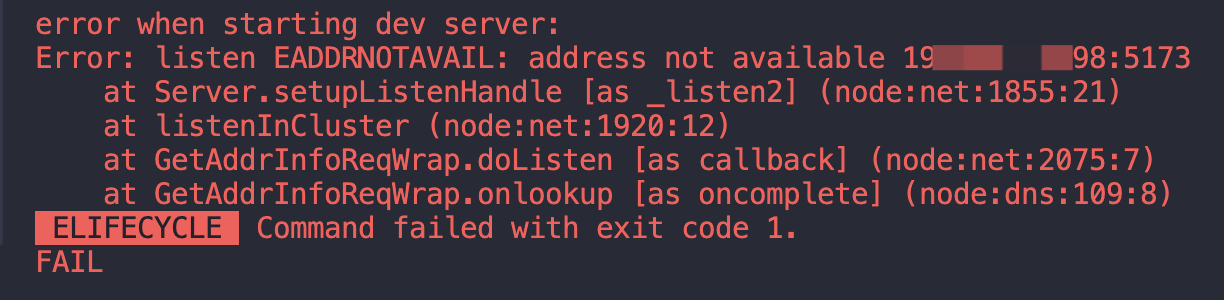
但我又不想关,那需要手动处理
更改 ip 配置(可选)
vite.config.ts加上 ip 配置
1
2
3
4
5
6
7
8
9
10
11
12
13
14
15
16
17
18
19
20
21
| import { fileURLToPath, URL } from 'node:url'
import { defineConfig } from 'vite'
import vue from '@vitejs/plugin-vue'
import VueDevTools from 'vite-plugin-vue-devtools'
export default defineConfig({
plugins: [vue(), VueDevTools()],
resolve: {
alias: {
'@': fileURLToPath(new URL('./src', import.meta.url))
}
},
server: {
host: true,
open: true
}
})
|
host 文档:https://vitejs.dev/config/server-options.html#server-host
open 文档:https://vitejs.dev/config/server-options.html#server-open
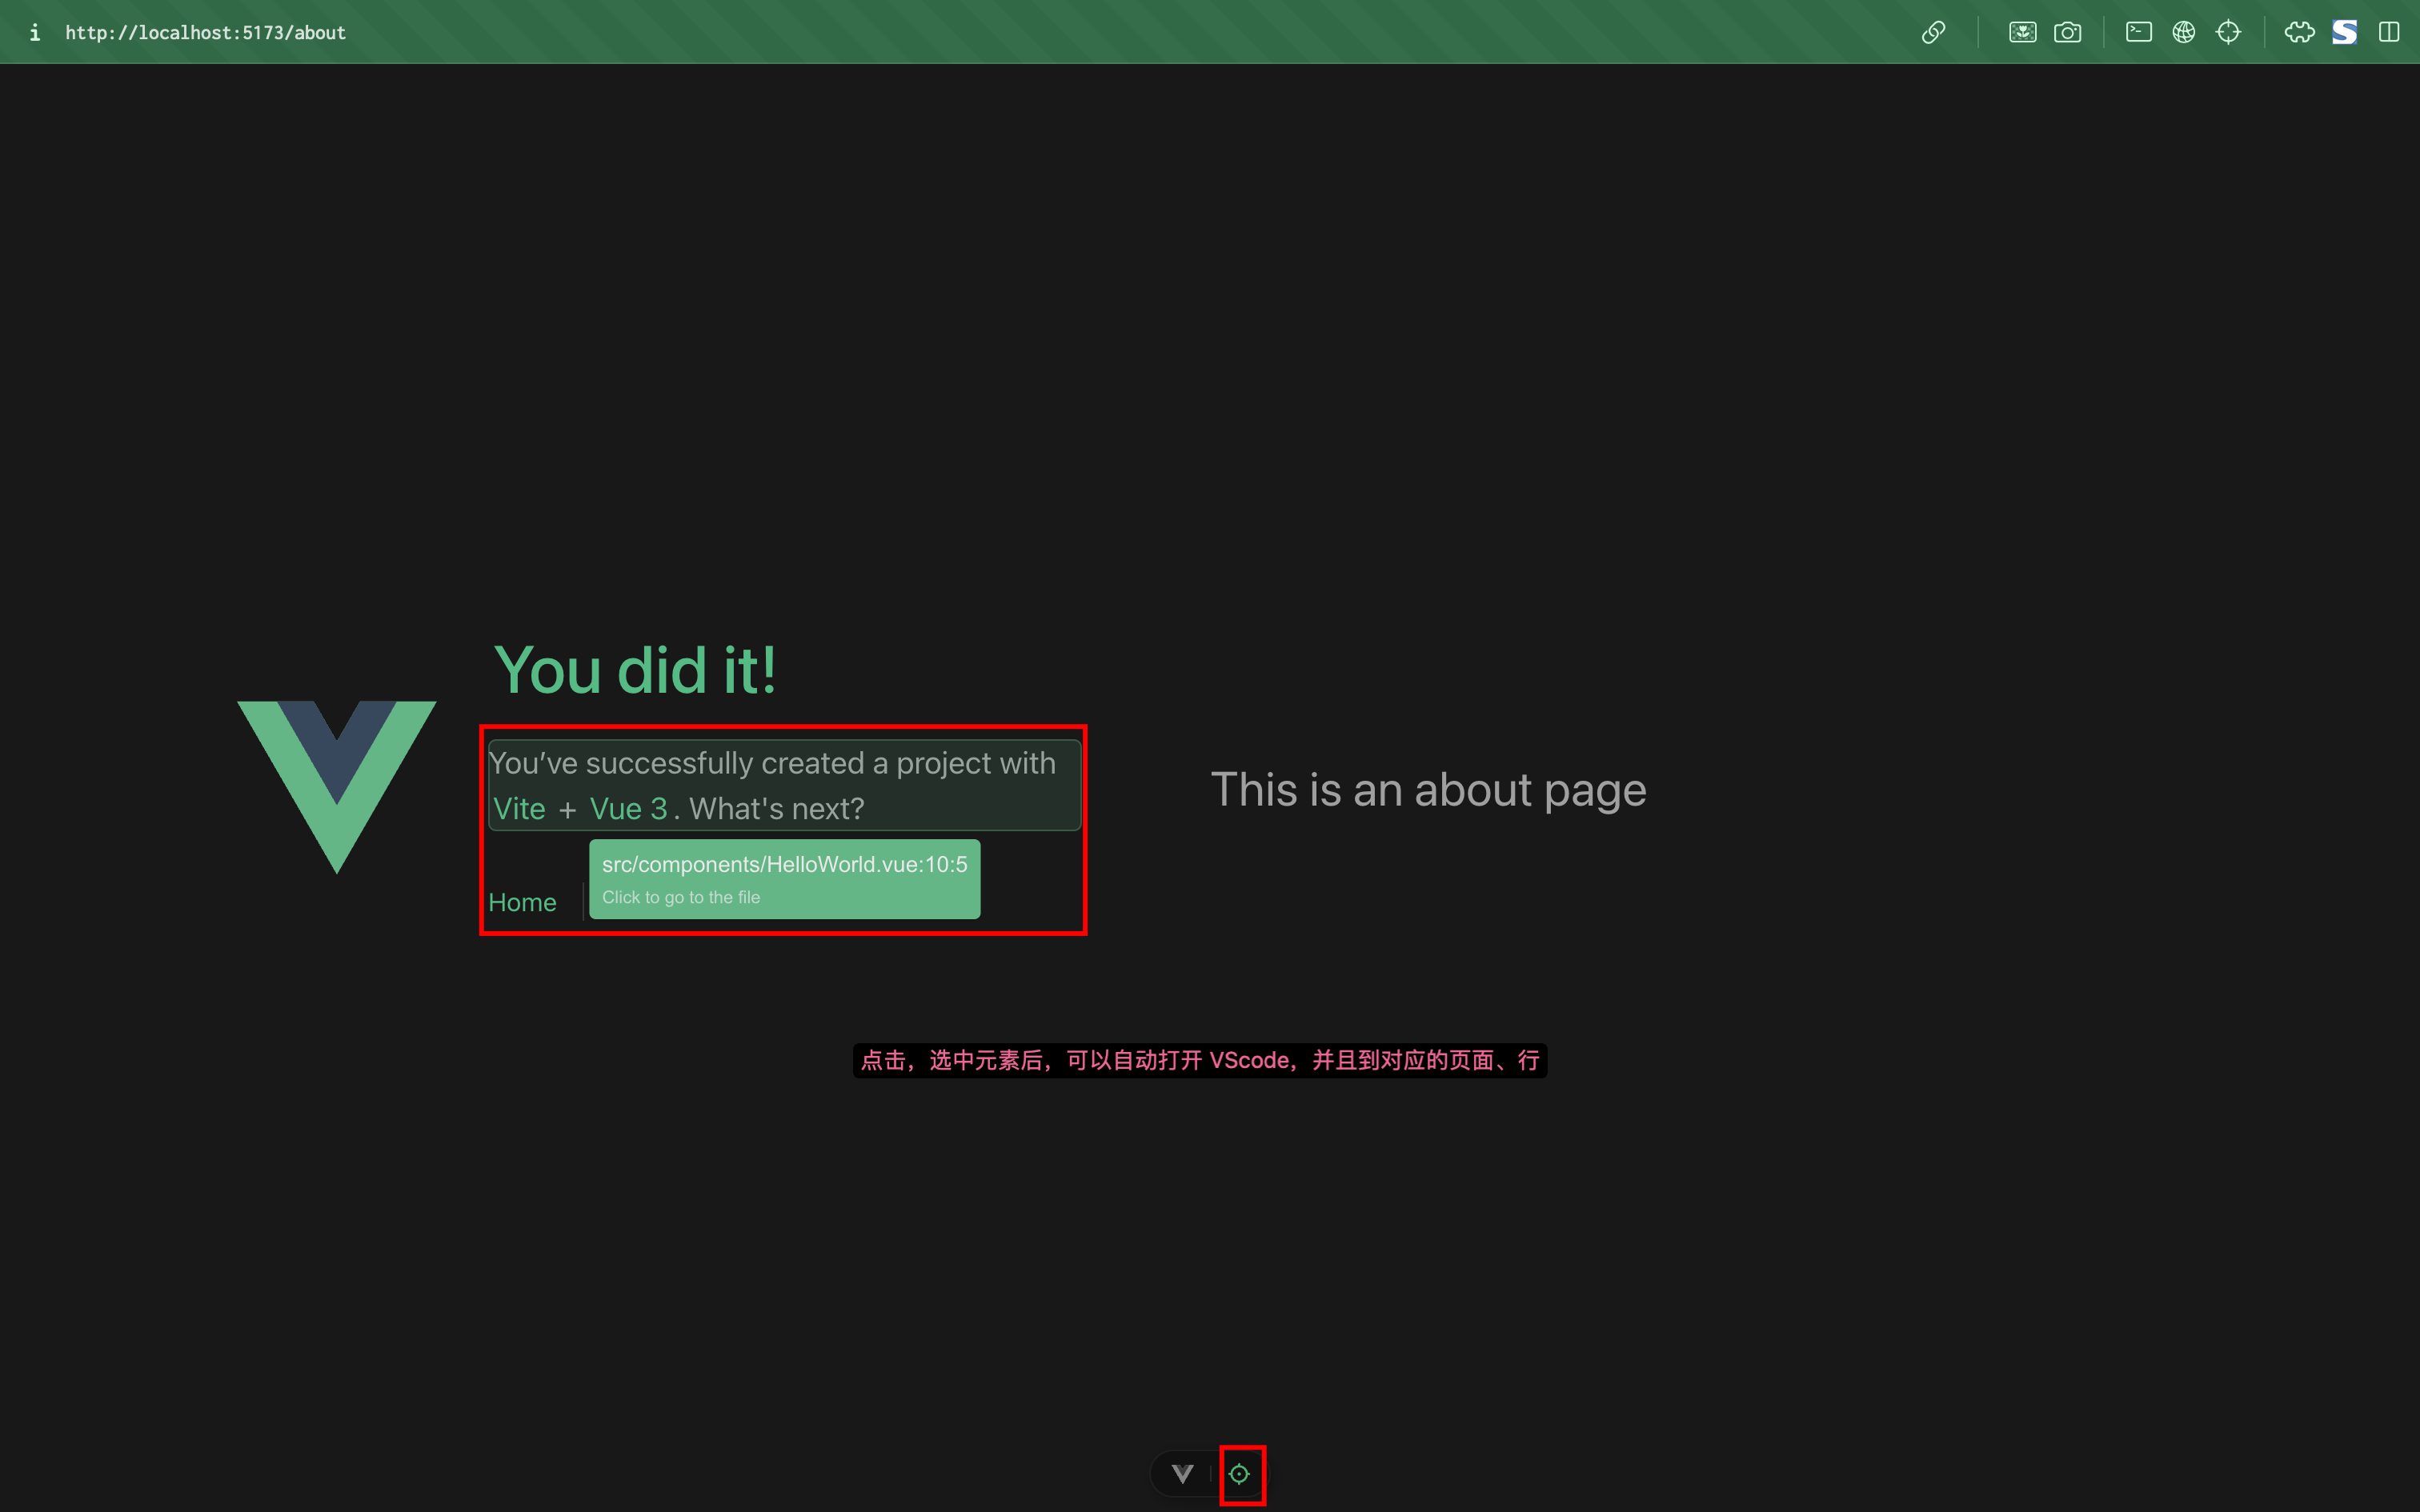
- 重新启动
pnpm dev,浏览器自动打开,然后页面如下(电脑深色模式下)
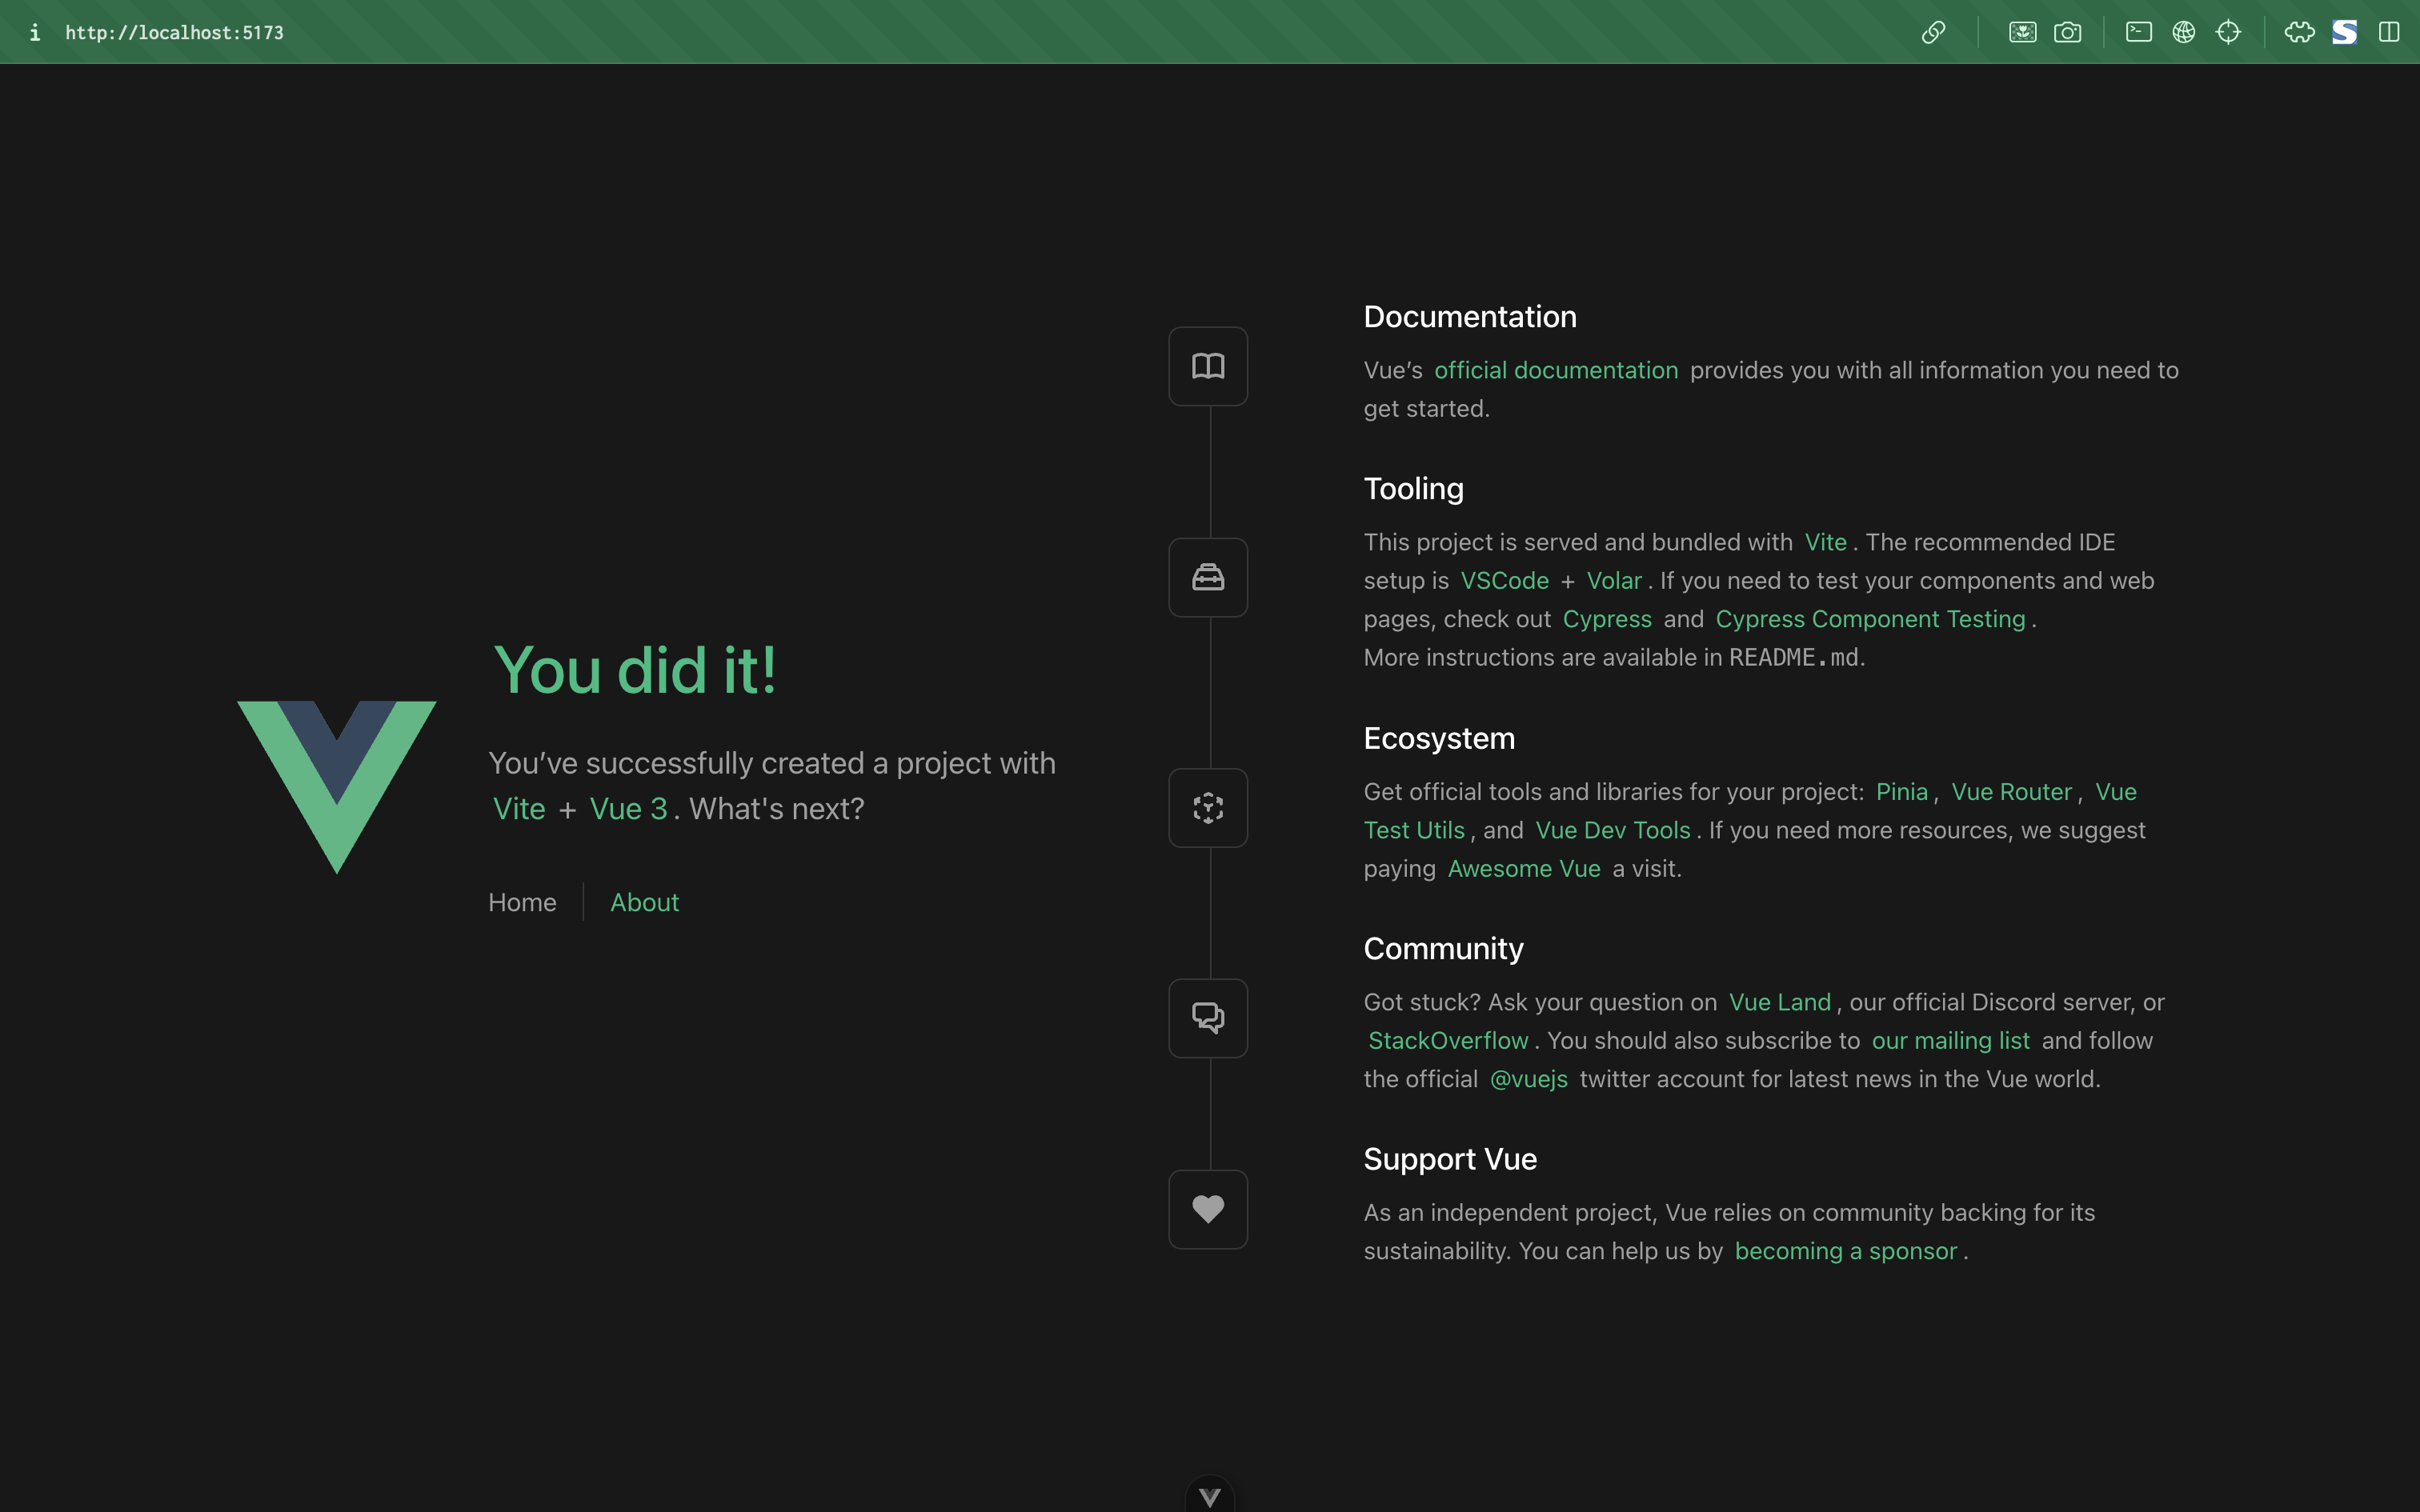
- 试用下
vue-devtool的功能,个人觉得挺好用的
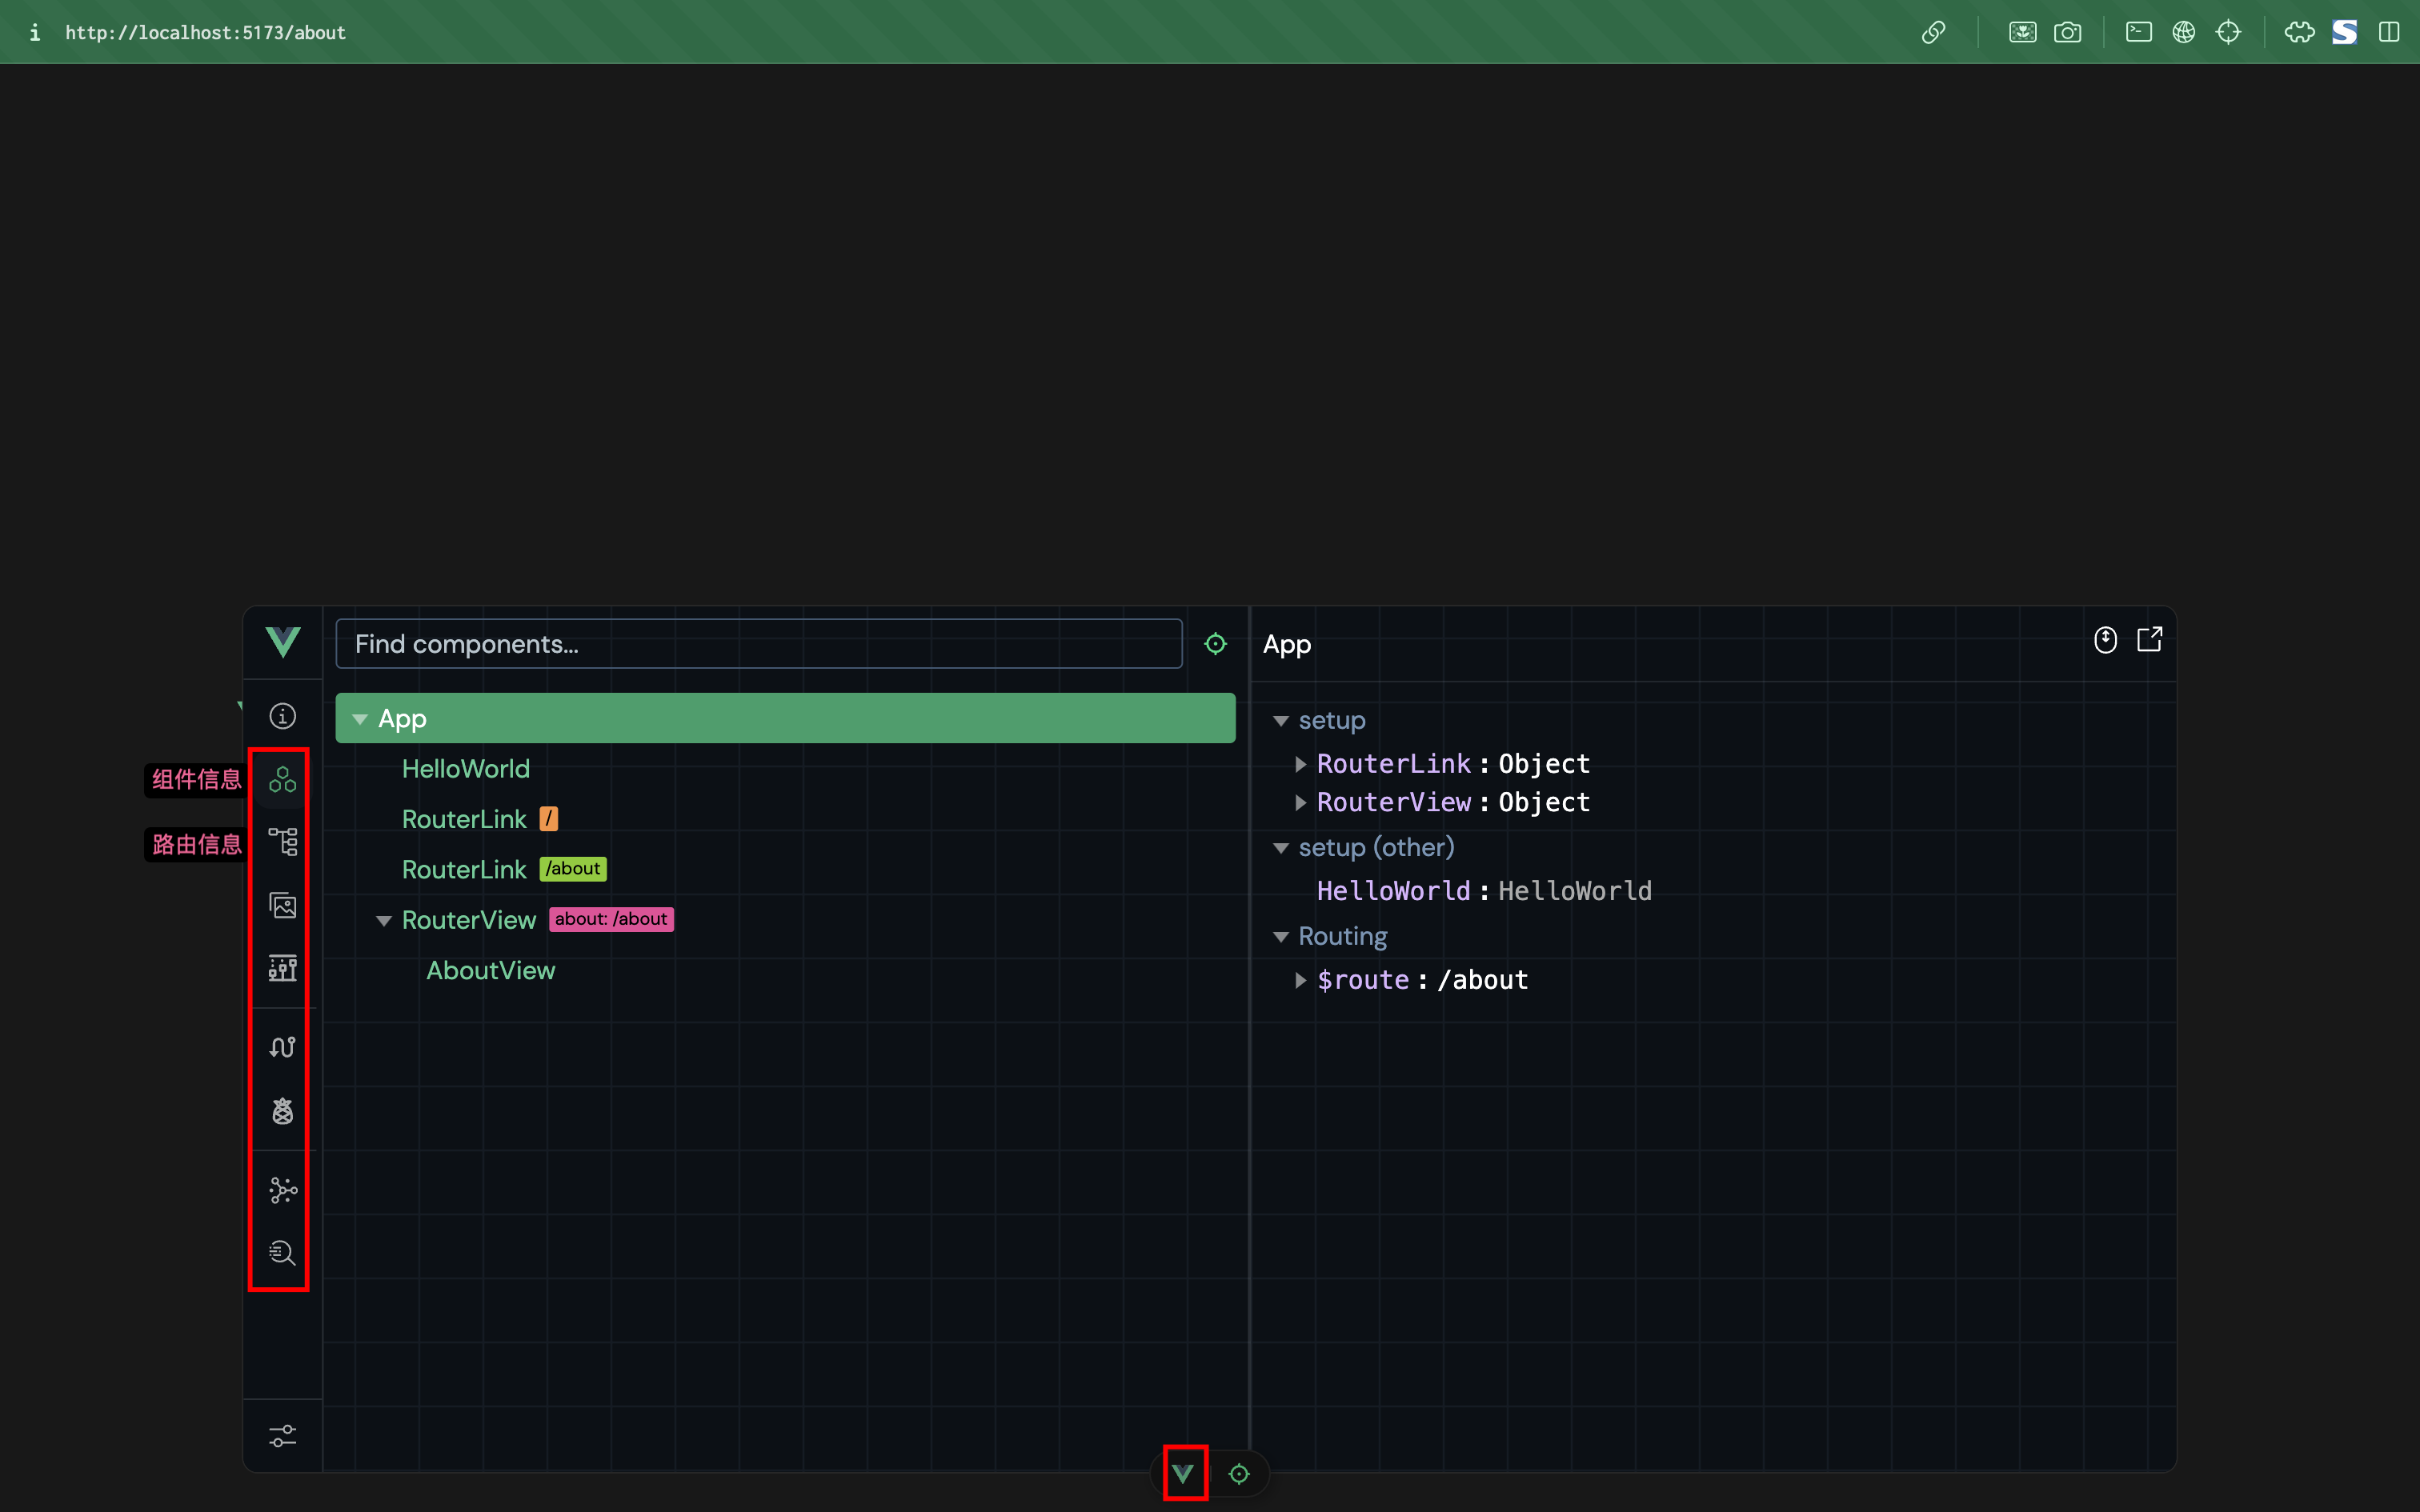
- 到此为止,使用了
vue3 + vite + pinia + vue-router + typescript
安装tailwindcss
官方文档:https://www.tailwindcss.cn/docs/installation
这是一个原子 css 库,使用后基本不用写 css 了,只写类名来完成样式“组装”
比如这样一段代码
1
2
3
4
5
6
| <main class="flex justify-center items-center flex-col px-[20px] gap-4">
<div class="text-xl text-sky-500">欢迎使用 random-number-system</div>
<p class="text-gray-500 text-sm">
它可以自动生成给定范围内的随机正整数,可用帮你打乱顺序记东西:比如记英语单词~
</p>
</main>
|
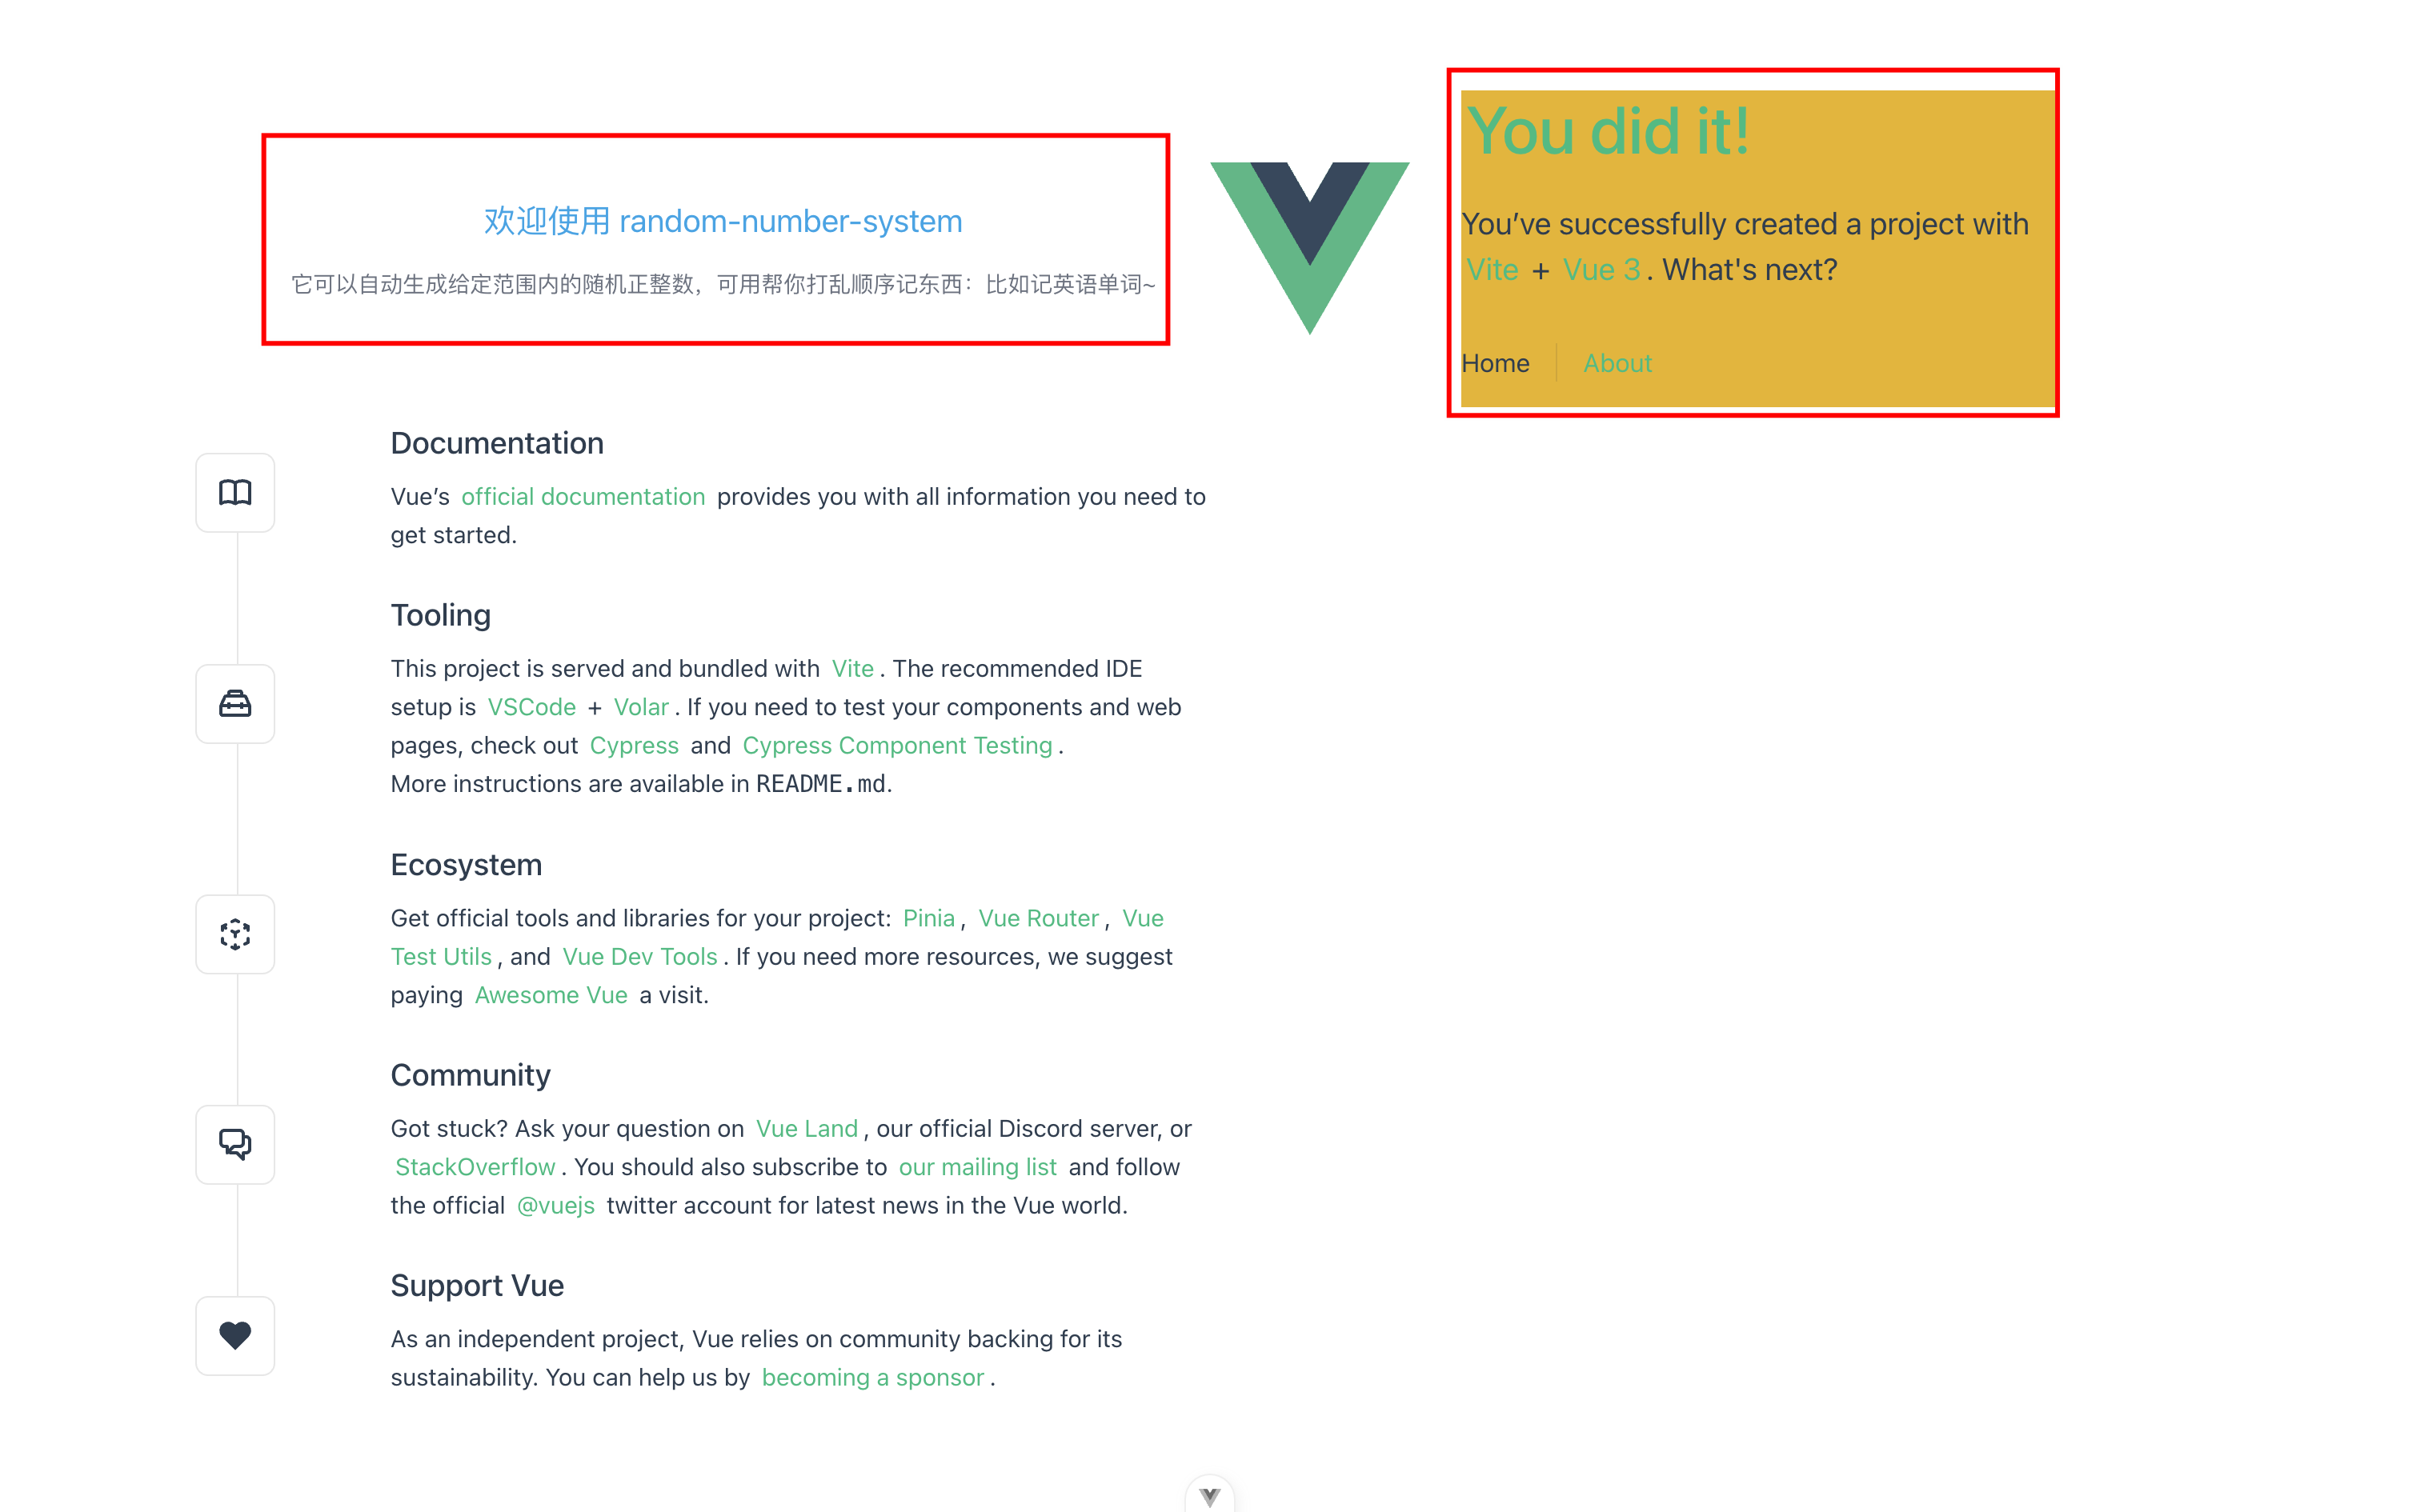
渲染出来的样式如下

安装文档:Install Tailwind CSS with Vite - Tailwind CSS
- 安装
tailwindcss与相关的依赖
1
| pnpm add -D tailwindcss postcss autoprefixer
|
- 生成
tailwind.config.js、postcss.config.js两个初始化的文件
- 配置
tailwind.config.js文件:添加所有模板文件的路径
1
2
3
4
5
6
7
8
9
|
export default {
content: ['./index.html', './src/**/*.{vue,js,ts,jsx,tsx}'],
theme: {
extend: {}
},
plugins: []
}
|
- 创建
tailwind的“基本配置” css 文件
src/index.css写入相关配置
1
2
3
| @tailwind base;
@tailwind components;
@tailwind utilities;
|
main.ts最上面引入src/index.css
1
2
3
4
5
6
7
8
9
10
11
12
13
14
15
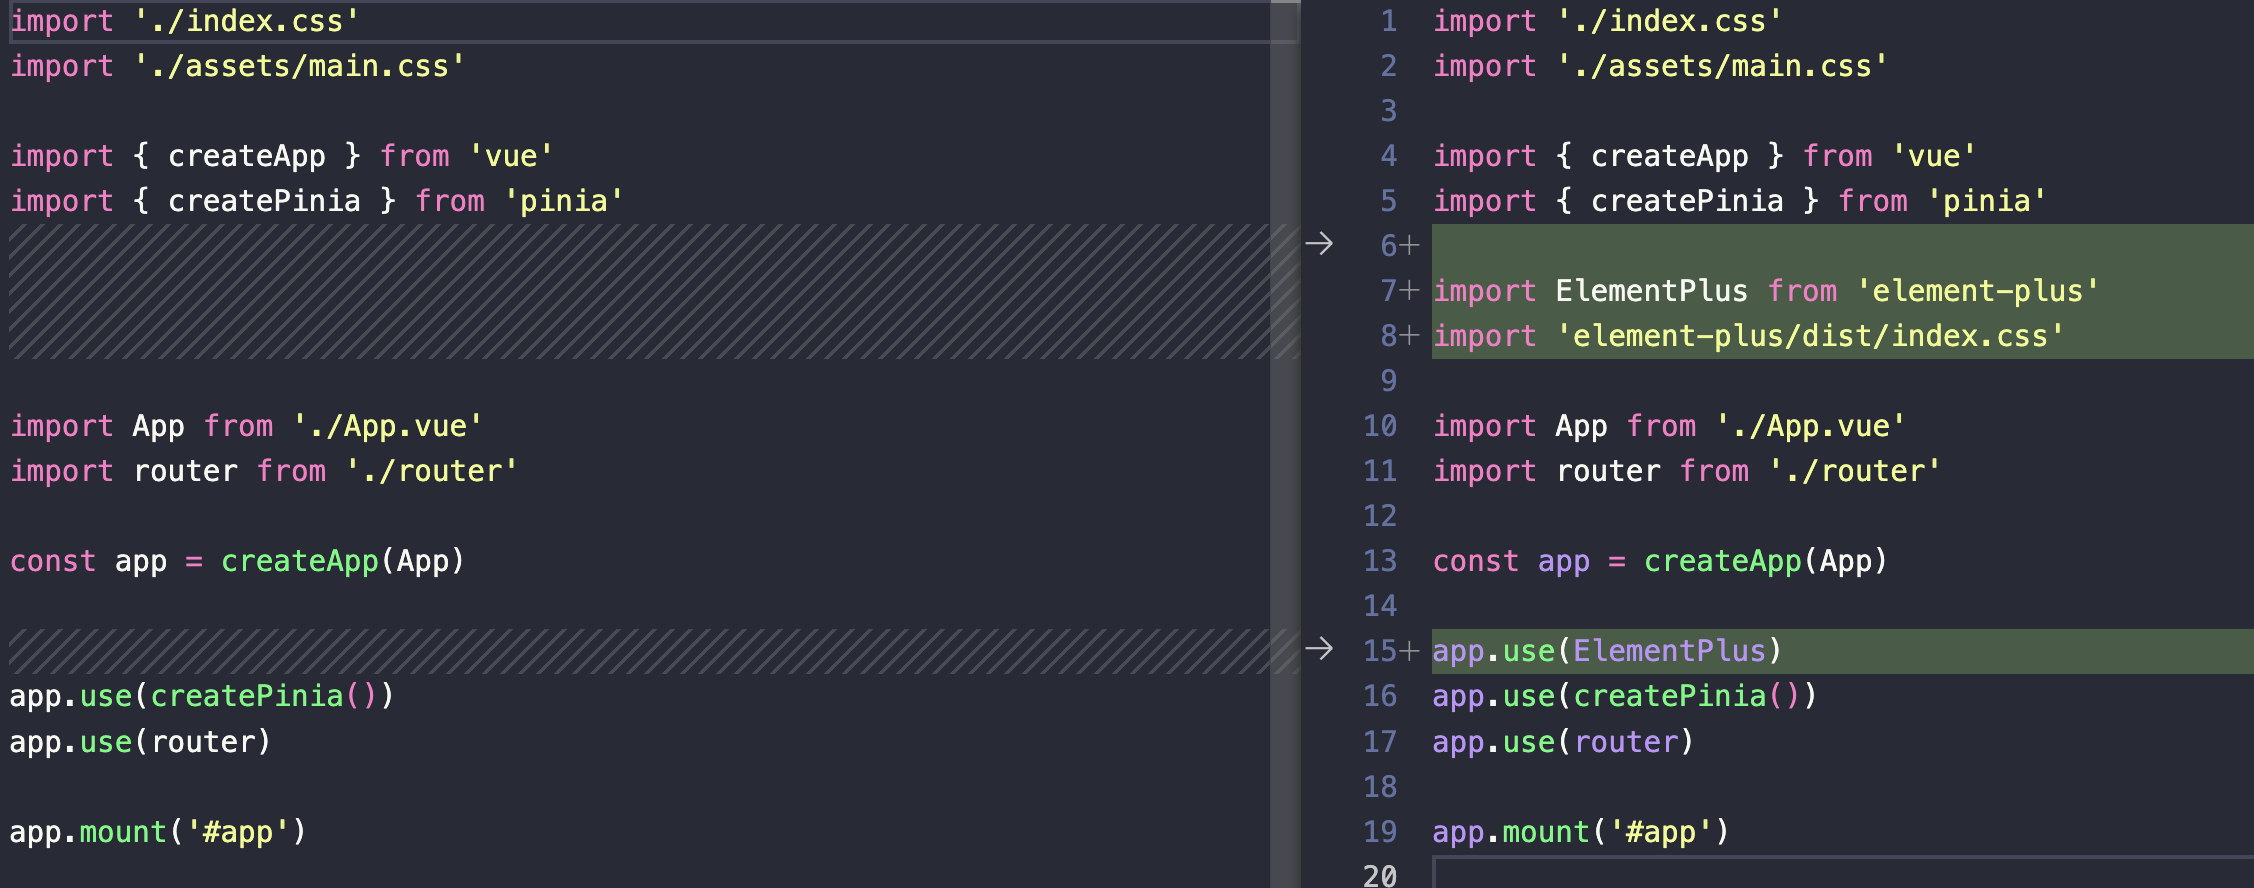
| import './index.css'
import './assets/main.css'
import { createApp } from 'vue'
import { createPinia } from 'pinia'
import App from './App.vue'
import router from './router'
const app = createApp(App)
app.use(createPinia())
app.use(router)
app.mount('#app')
|
App.vue里面使用tailwindcss,看看是否生效
1
2
3
4
5
6
7
|
<main class="flex justify-center items-center flex-col px-[20px] gap-4">
    <div class="text-xl text-sky-500">欢迎使用 random-number-system</div>
    <p class="text-gray-500 text-sm">
      它可以自动生成给定范围内的随机正整数,可用帮你打乱顺序记东西:比如记英语单词~
    </p>
</main>
|
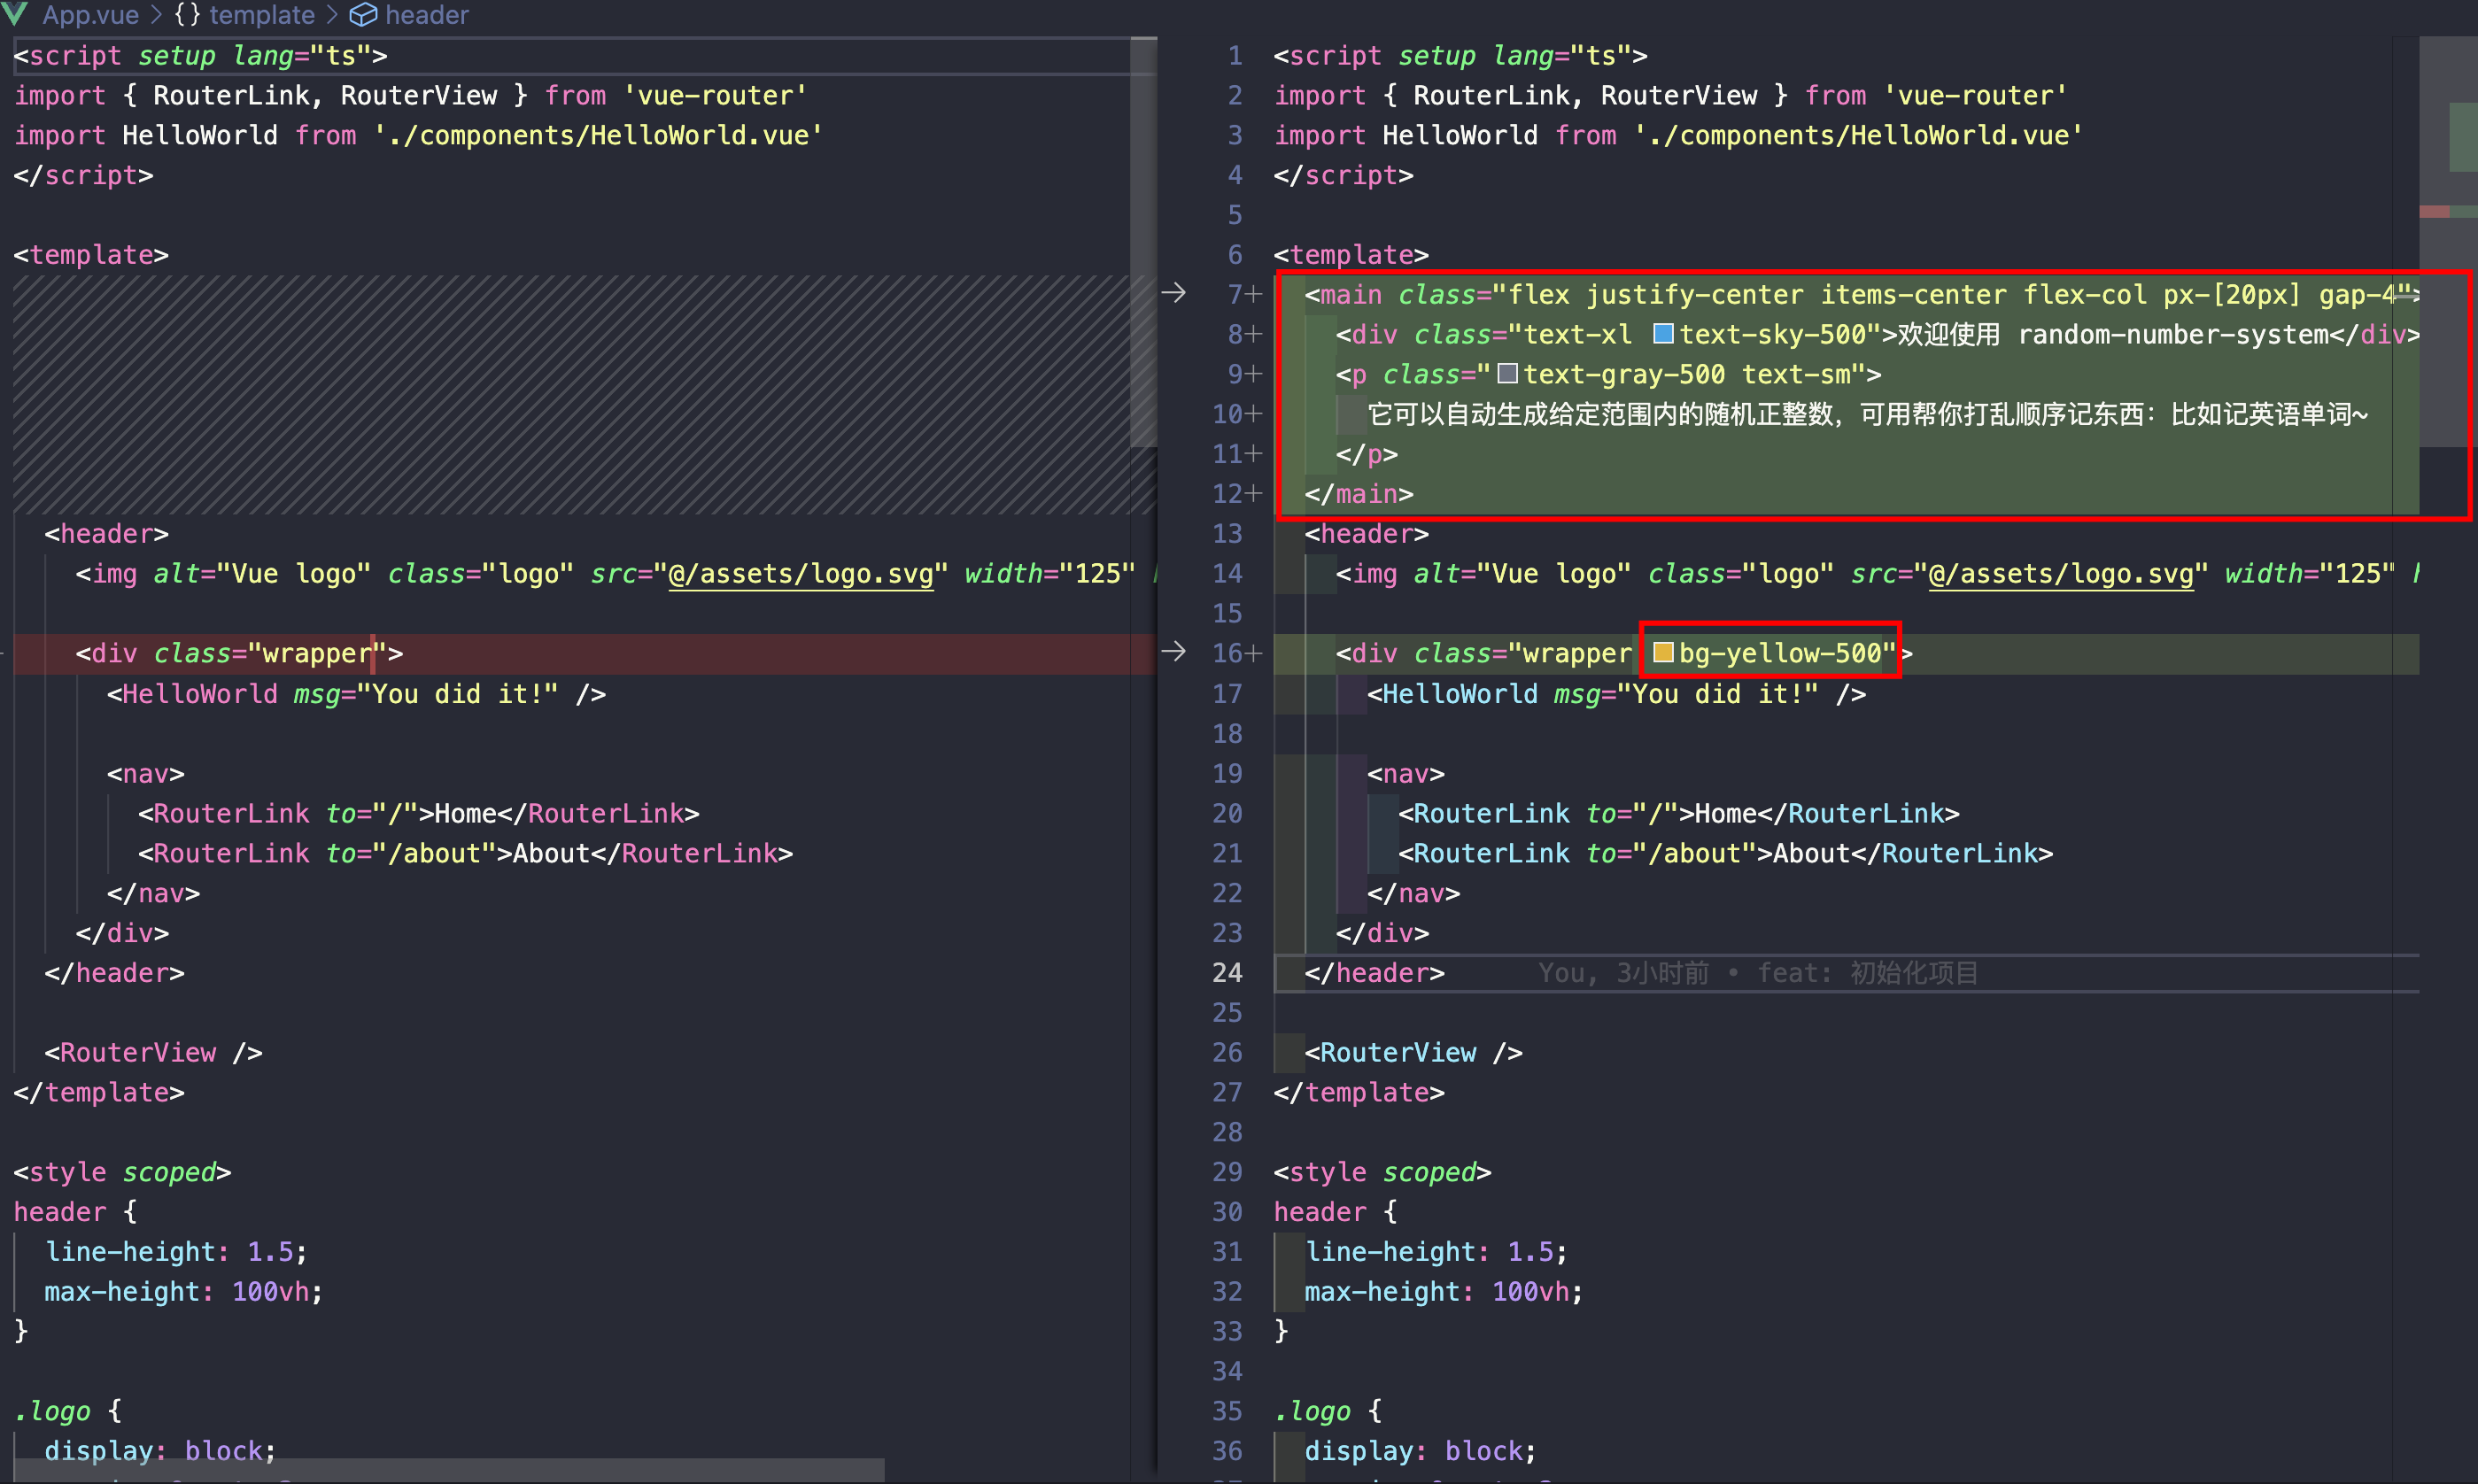
可以看到生效了
安装 Headlessui(可选)
官方文档:https://headlessui.com/,一个基于tailwindcss的组件库
它只提供组件的基本功能与交互,剩下的样式需要自己去写。写的时候可以用tailwindcss
使用场景:公司的设计风格比较小众,市面上的组件库样式不支持,自己完全手写时,功能实现繁琐,所以即可以用 Headlessui,它提供基础功能,样式自己发挥
- 安装
Headlessui依赖
1
| pnpm add @headlessui/vue
|
- 新建一个组件,验证下
@headlessui/vue
1
| touch src/components/CusSwitch.vue
|
- 输入
v3tss,回车生成模板代码

1
2
3
4
5
6
7
| <template>
<div></div>
</template>
<script setup lang="ts"></script>
<style scoped></style>
|
- 使用
headlessui 的 Switch写个组件,代码如下(来自官网示例):
1
2
3
4
5
6
7
8
9
10
11
12
13
14
15
16
17
18
19
20
21
22
23
24
25
| <template>
<div class="py-16">
<Switch
v-model="enabled"
:class="enabled ? 'bg-teal-900' : 'bg-teal-700'"
class="relative inline-flex h-[38px] w-[74px] shrink-0 cursor-pointer rounded-full border-2 border-transparent transition-colors duration-200 ease-in-out focus:outline-none focus-visible:ring-2 focus-visible:ring-white/75"
>
<span class="sr-only">Use setting</span>
<span
aria-hidden="true"
:class="enabled ? 'translate-x-9' : 'translate-x-0'"
class="pointer-events-none inline-block h-[34px] w-[34px] transform rounded-full bg-white shadow-lg ring-0 transition duration-200 ease-in-out"
/>
</Switch>
</div>
</template>
<script setup lang="ts">
import { ref } from 'vue'
import { Switch } from '@headlessui/vue'
const enabled = ref(false)
</script>
<style scoped></style>
|
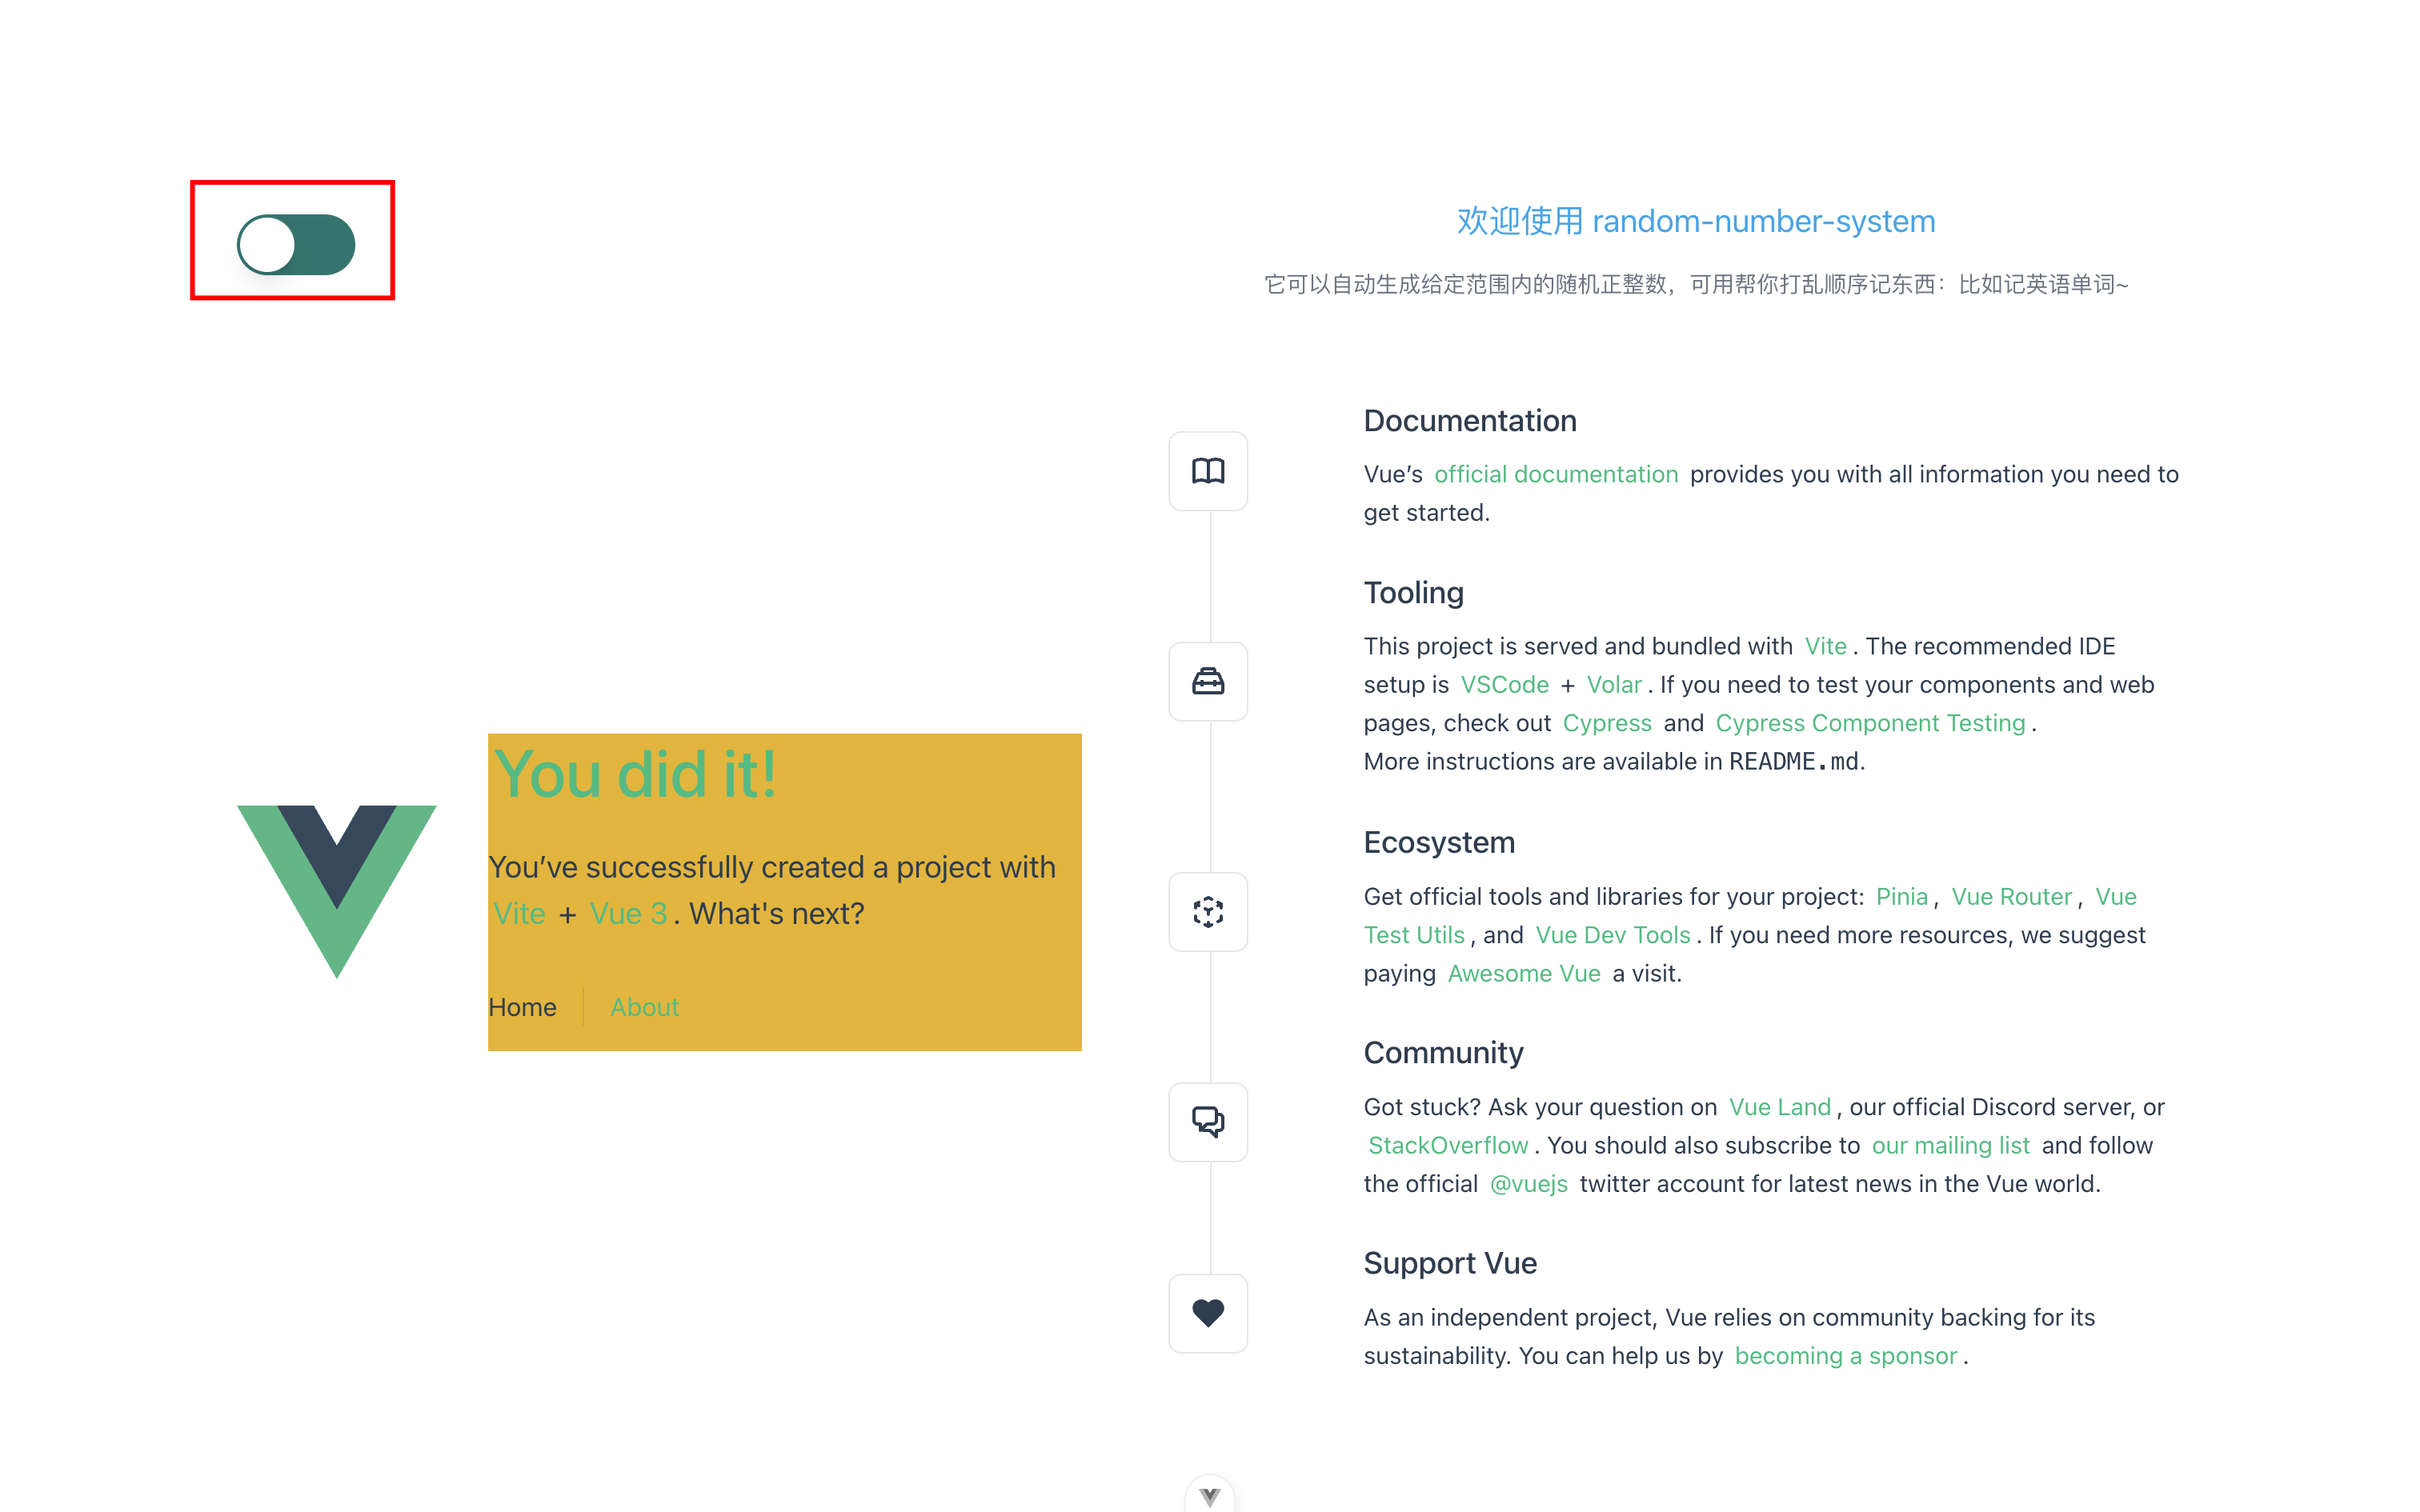
App.vue引入组件
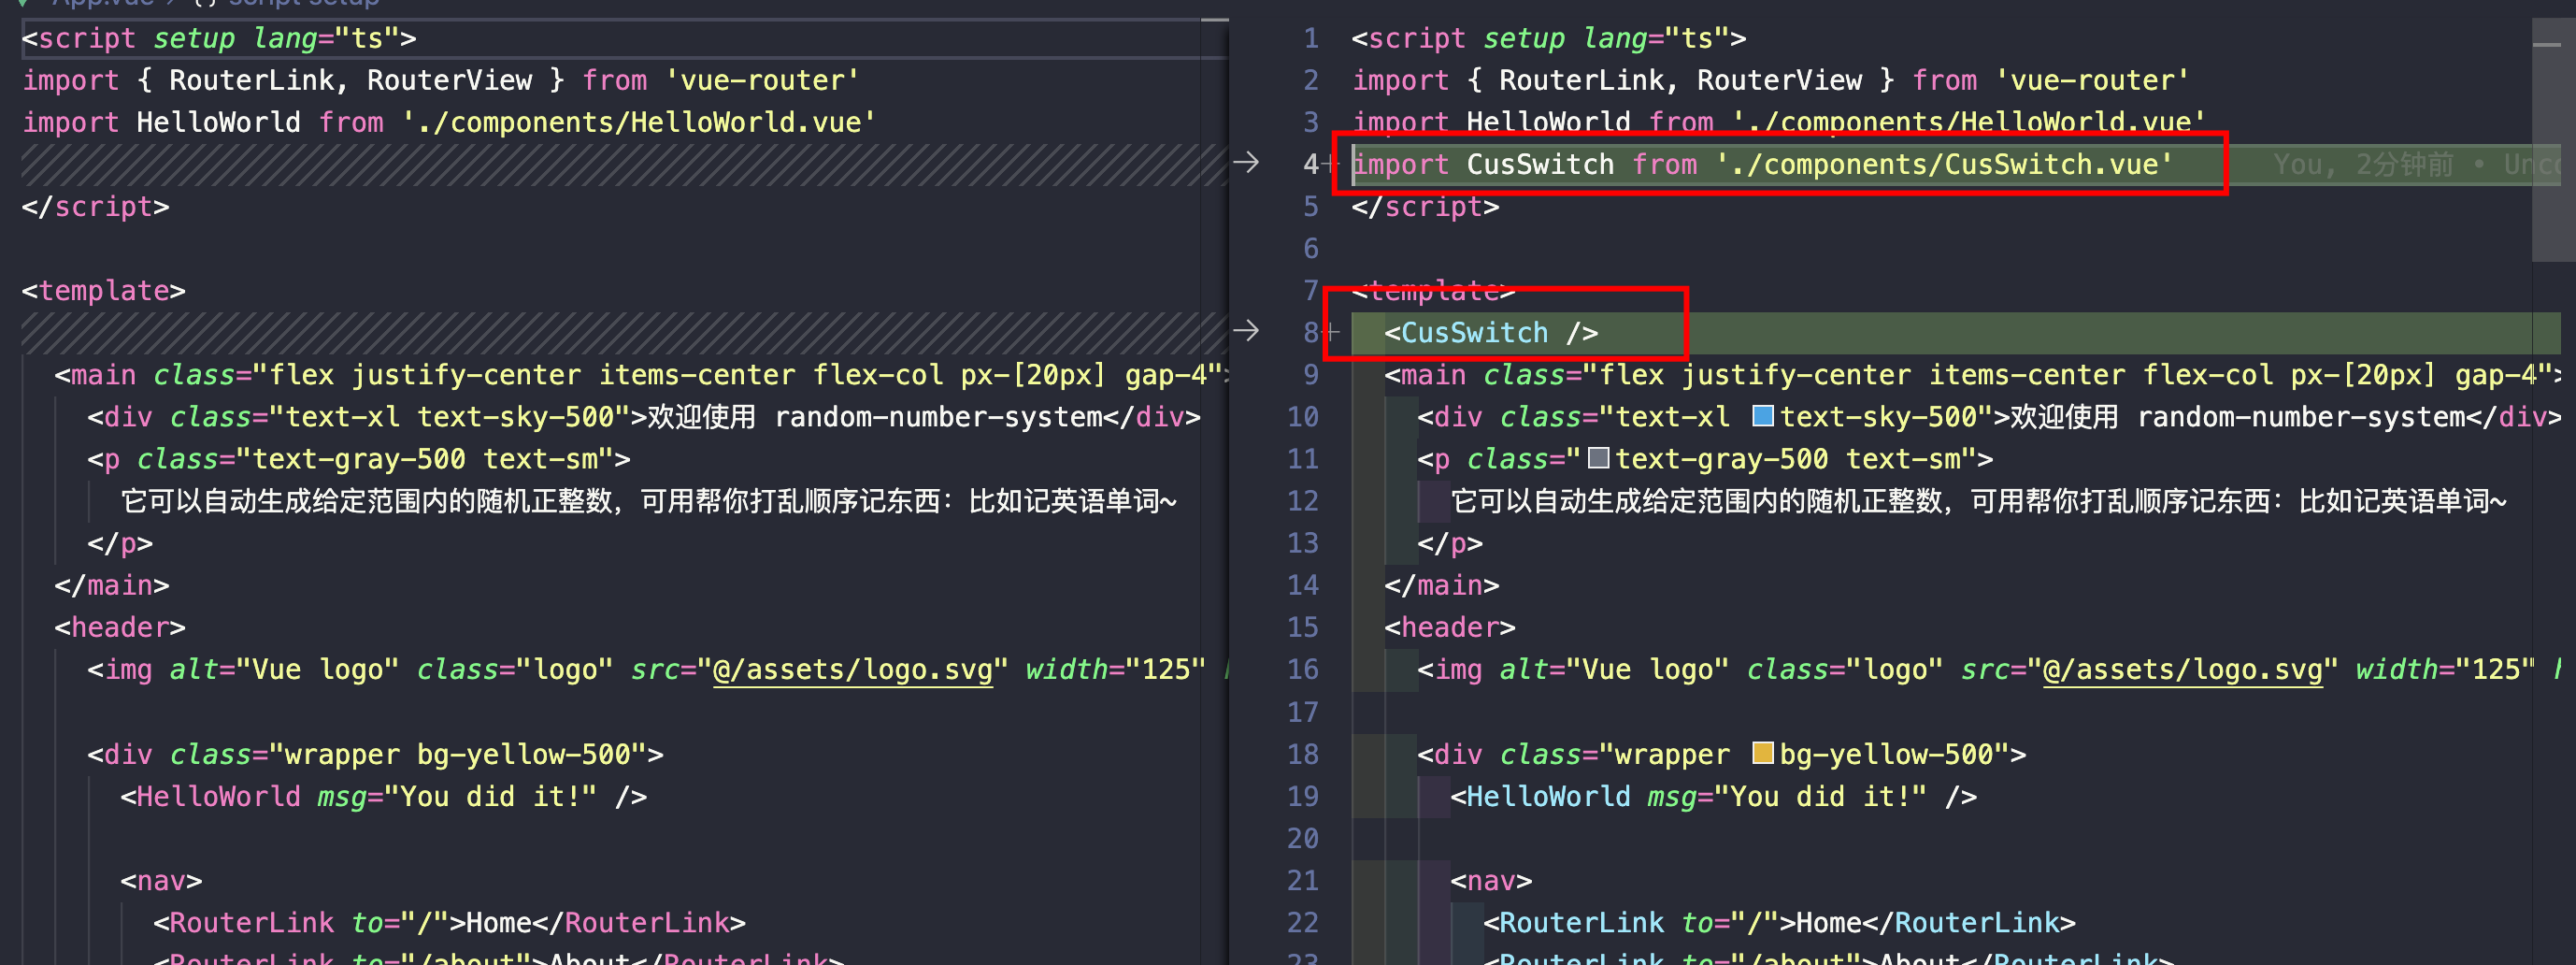
- 页面效果如下:
安装 Heroicons(可选)
官方文档:https://heroicons.com/,一个基于tailwindcss的图标库
支持 SVG、引入方式使用
- 安装
Heroicons依赖
1
| pnpm add @headlessui/vue
|
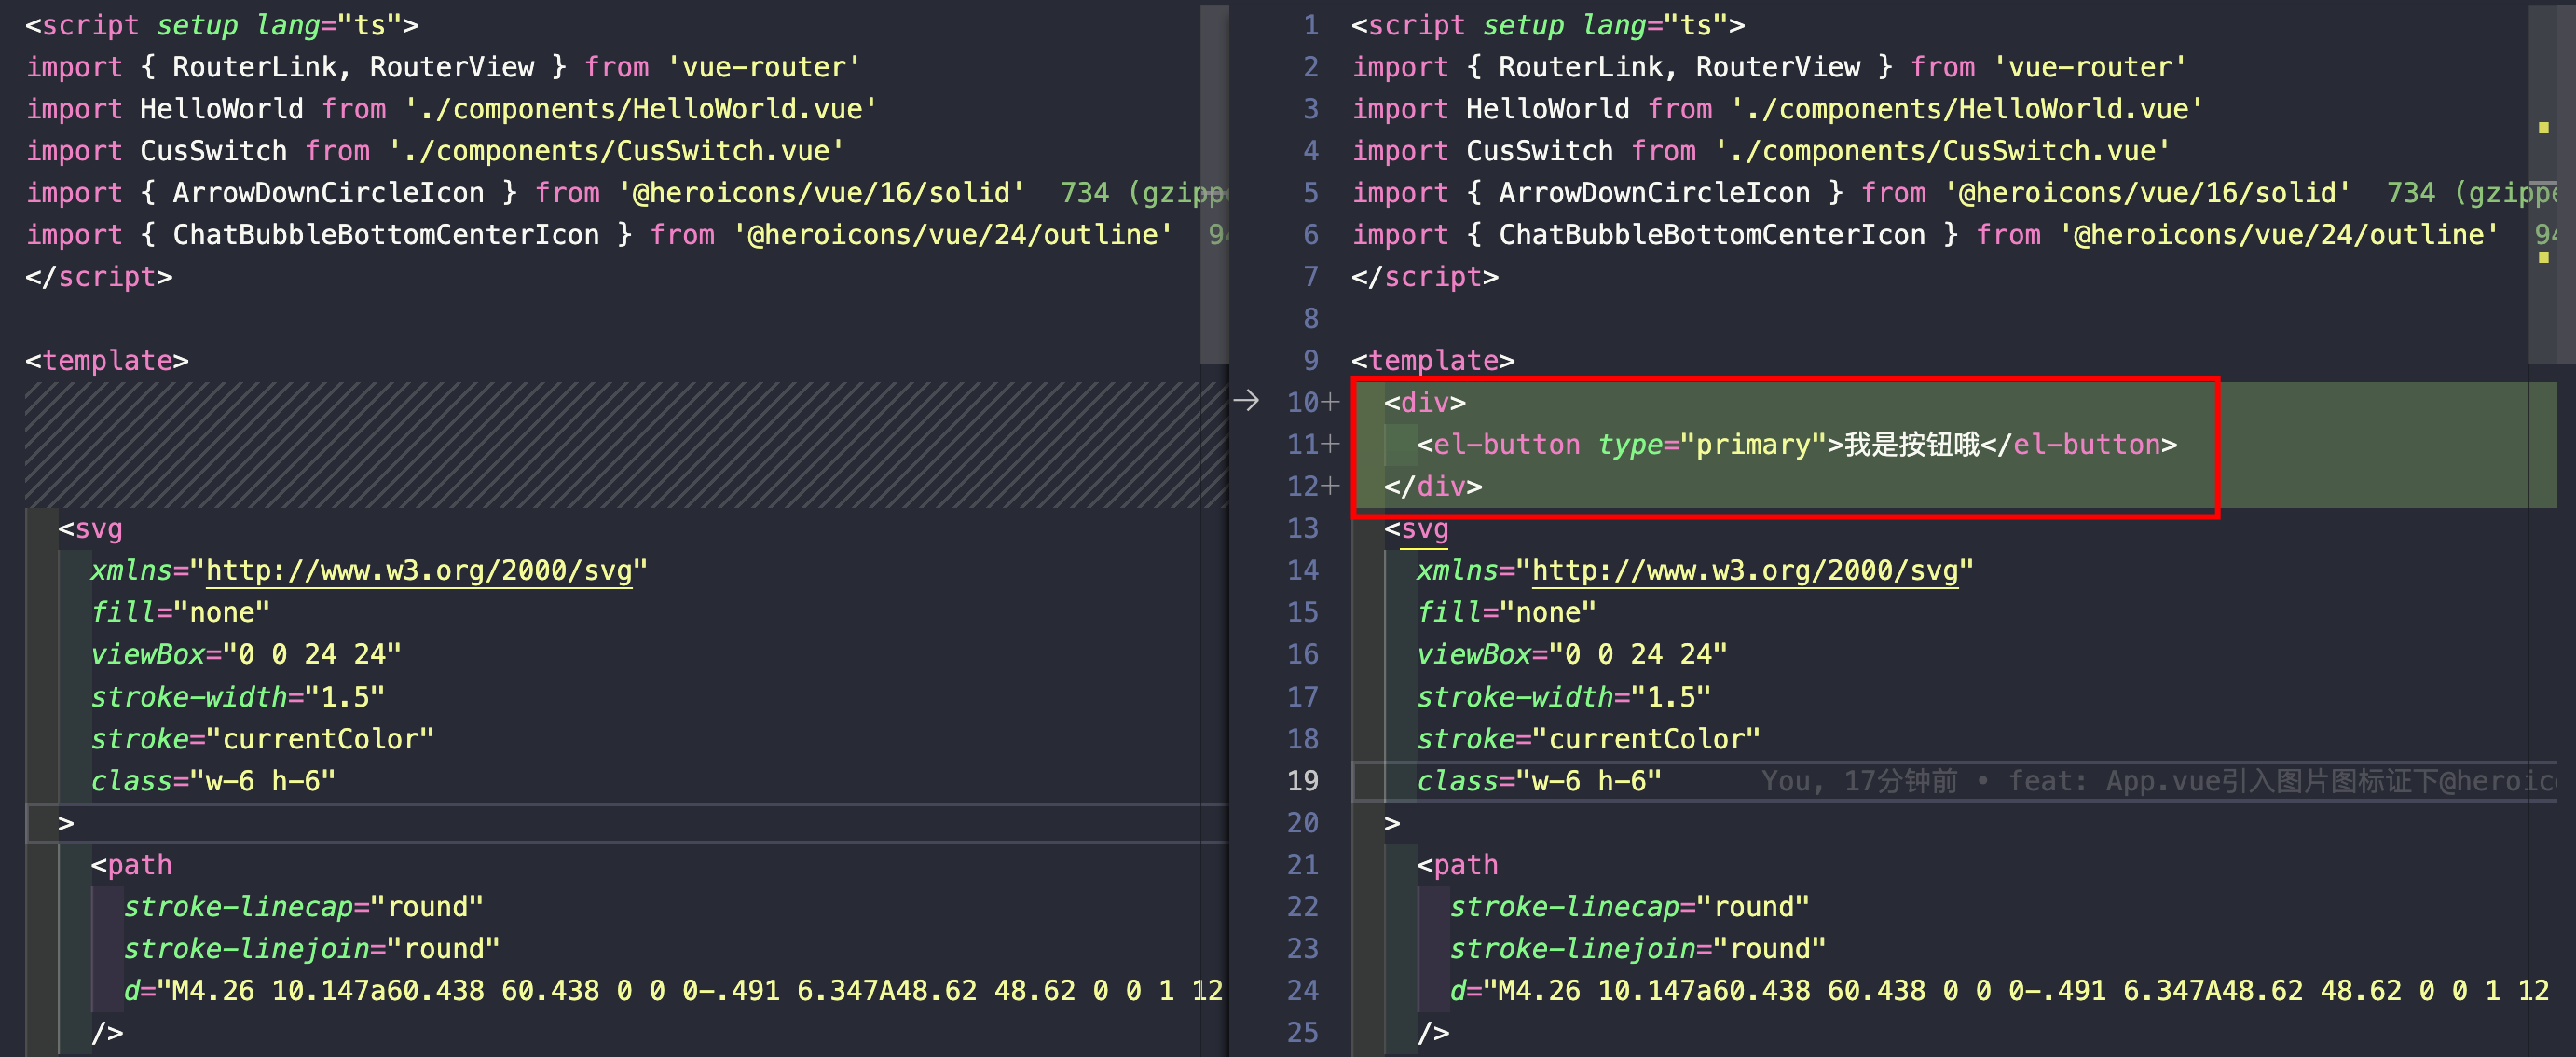
App.vue引入图片图标证下@heroicons/vue
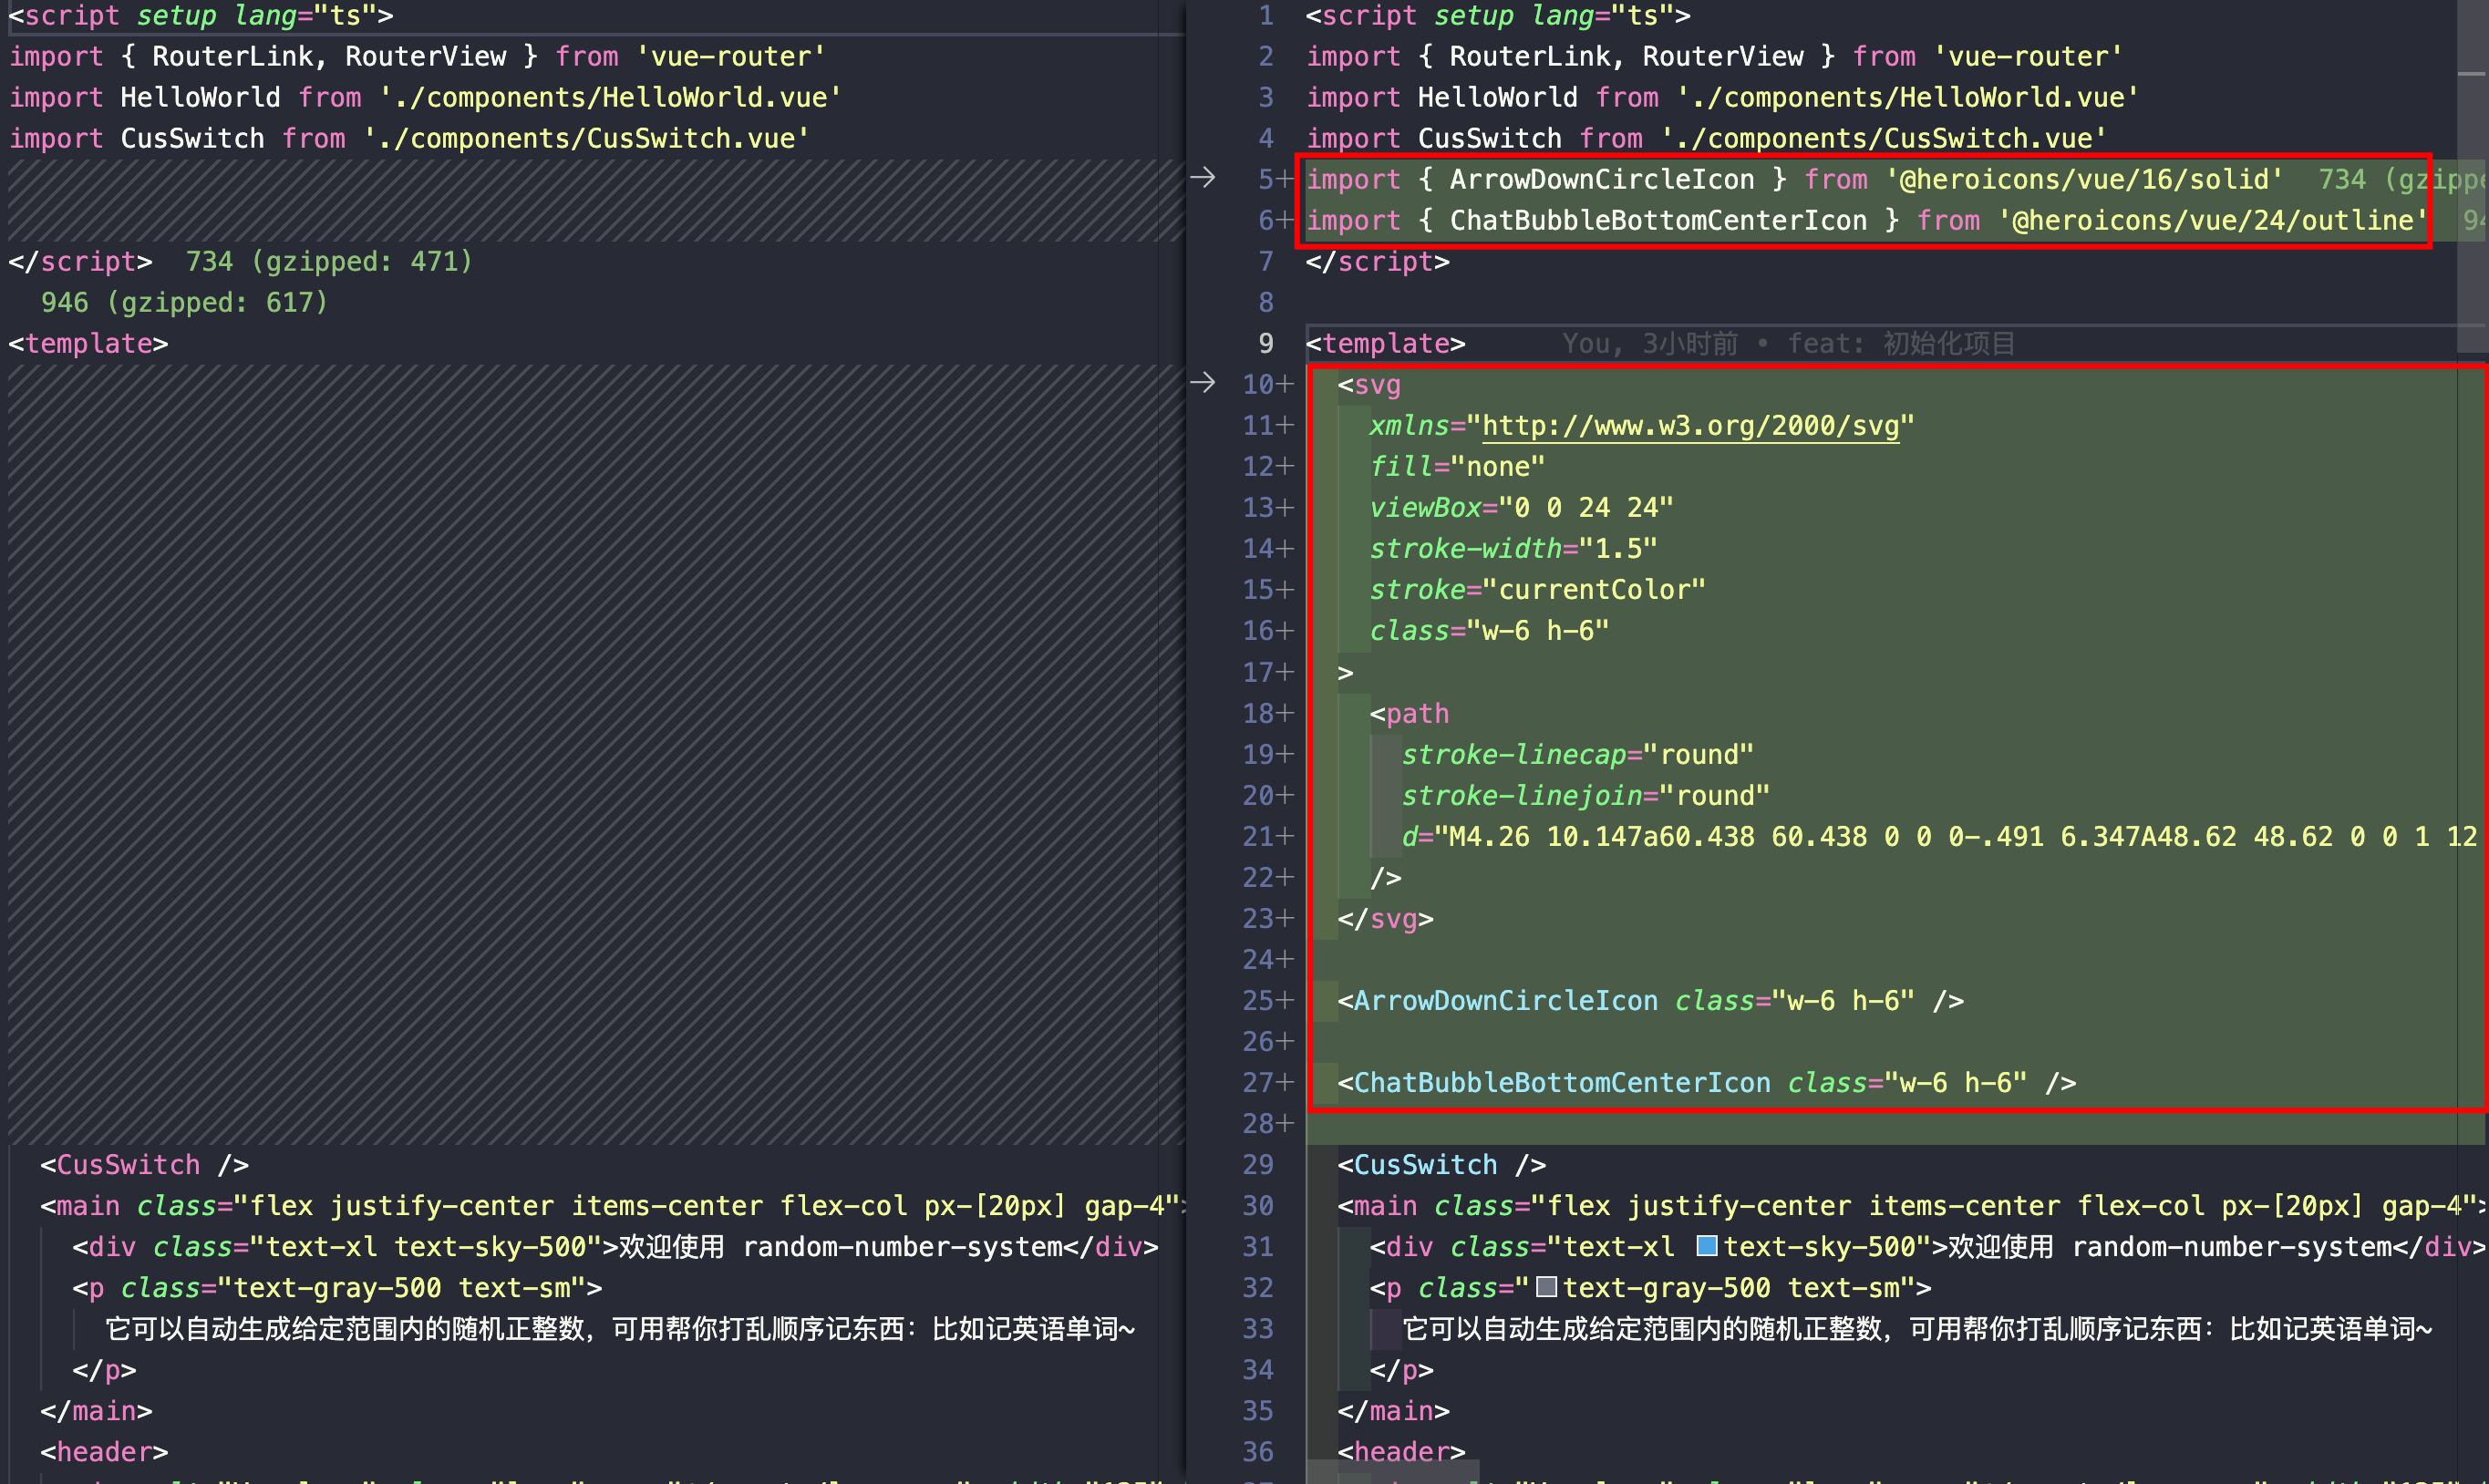
更改的代码如下:
1
2
3
4
5
6
7
8
9
10
11
12
13
14
15
16
17
18
19
20
21
22
23
24
25
26
27
28
29
| <script setup lang="ts">
import { ArrowDownCircleIcon } from '@heroicons/vue/16/solid'
import { ChatBubbleBottomCenterIcon } from '@heroicons/vue/24/outline'
</script>
<template>
<svg
xmlns="http://www.w3.org/2000/svg"
fill="none"
viewBox="0 0 24 24"
stroke-width="1.5"
stroke="currentColor"
class="w-6 h-6"
>
<path
stroke-linecap="round"
stroke-linejoin="round"
d="M4.26 10.147a60.438 60.438 0 0 0-.491 6.347A48.62 48.62 0 0 1 12 20.904a48.62 48.62 0 0 1 8.232-4.41 60.46 60.46 0 0 0-.491-6.347m-15.482 0a50.636 50.636 0 0 0-2.658-.813A59.906 59.906 0 0 1 12 3.493a59.903 59.903 0 0 1 10.399 5.84c-.896.248-1.783.52-2.658.814m-15.482 0A50.717 50.717 0 0 1 12 13.489a50.702 50.702 0 0 1 7.74-3.342M6.75 15a.75.75 0 1 0 0-1.5.75.75 0 0 0 0 1.5Zm0 0v-3.675A55.378 55.378 0 0 1 12 8.443m-7.007 11.55A5.981 5.981 0 0 0 6.75 15.75v-1.5"
/>
</svg>
<ArrowDownCircleIcon class="w-6 h-6" />
<ChatBubbleBottomCenterIcon class="w-6 h-6" />
</template>
|
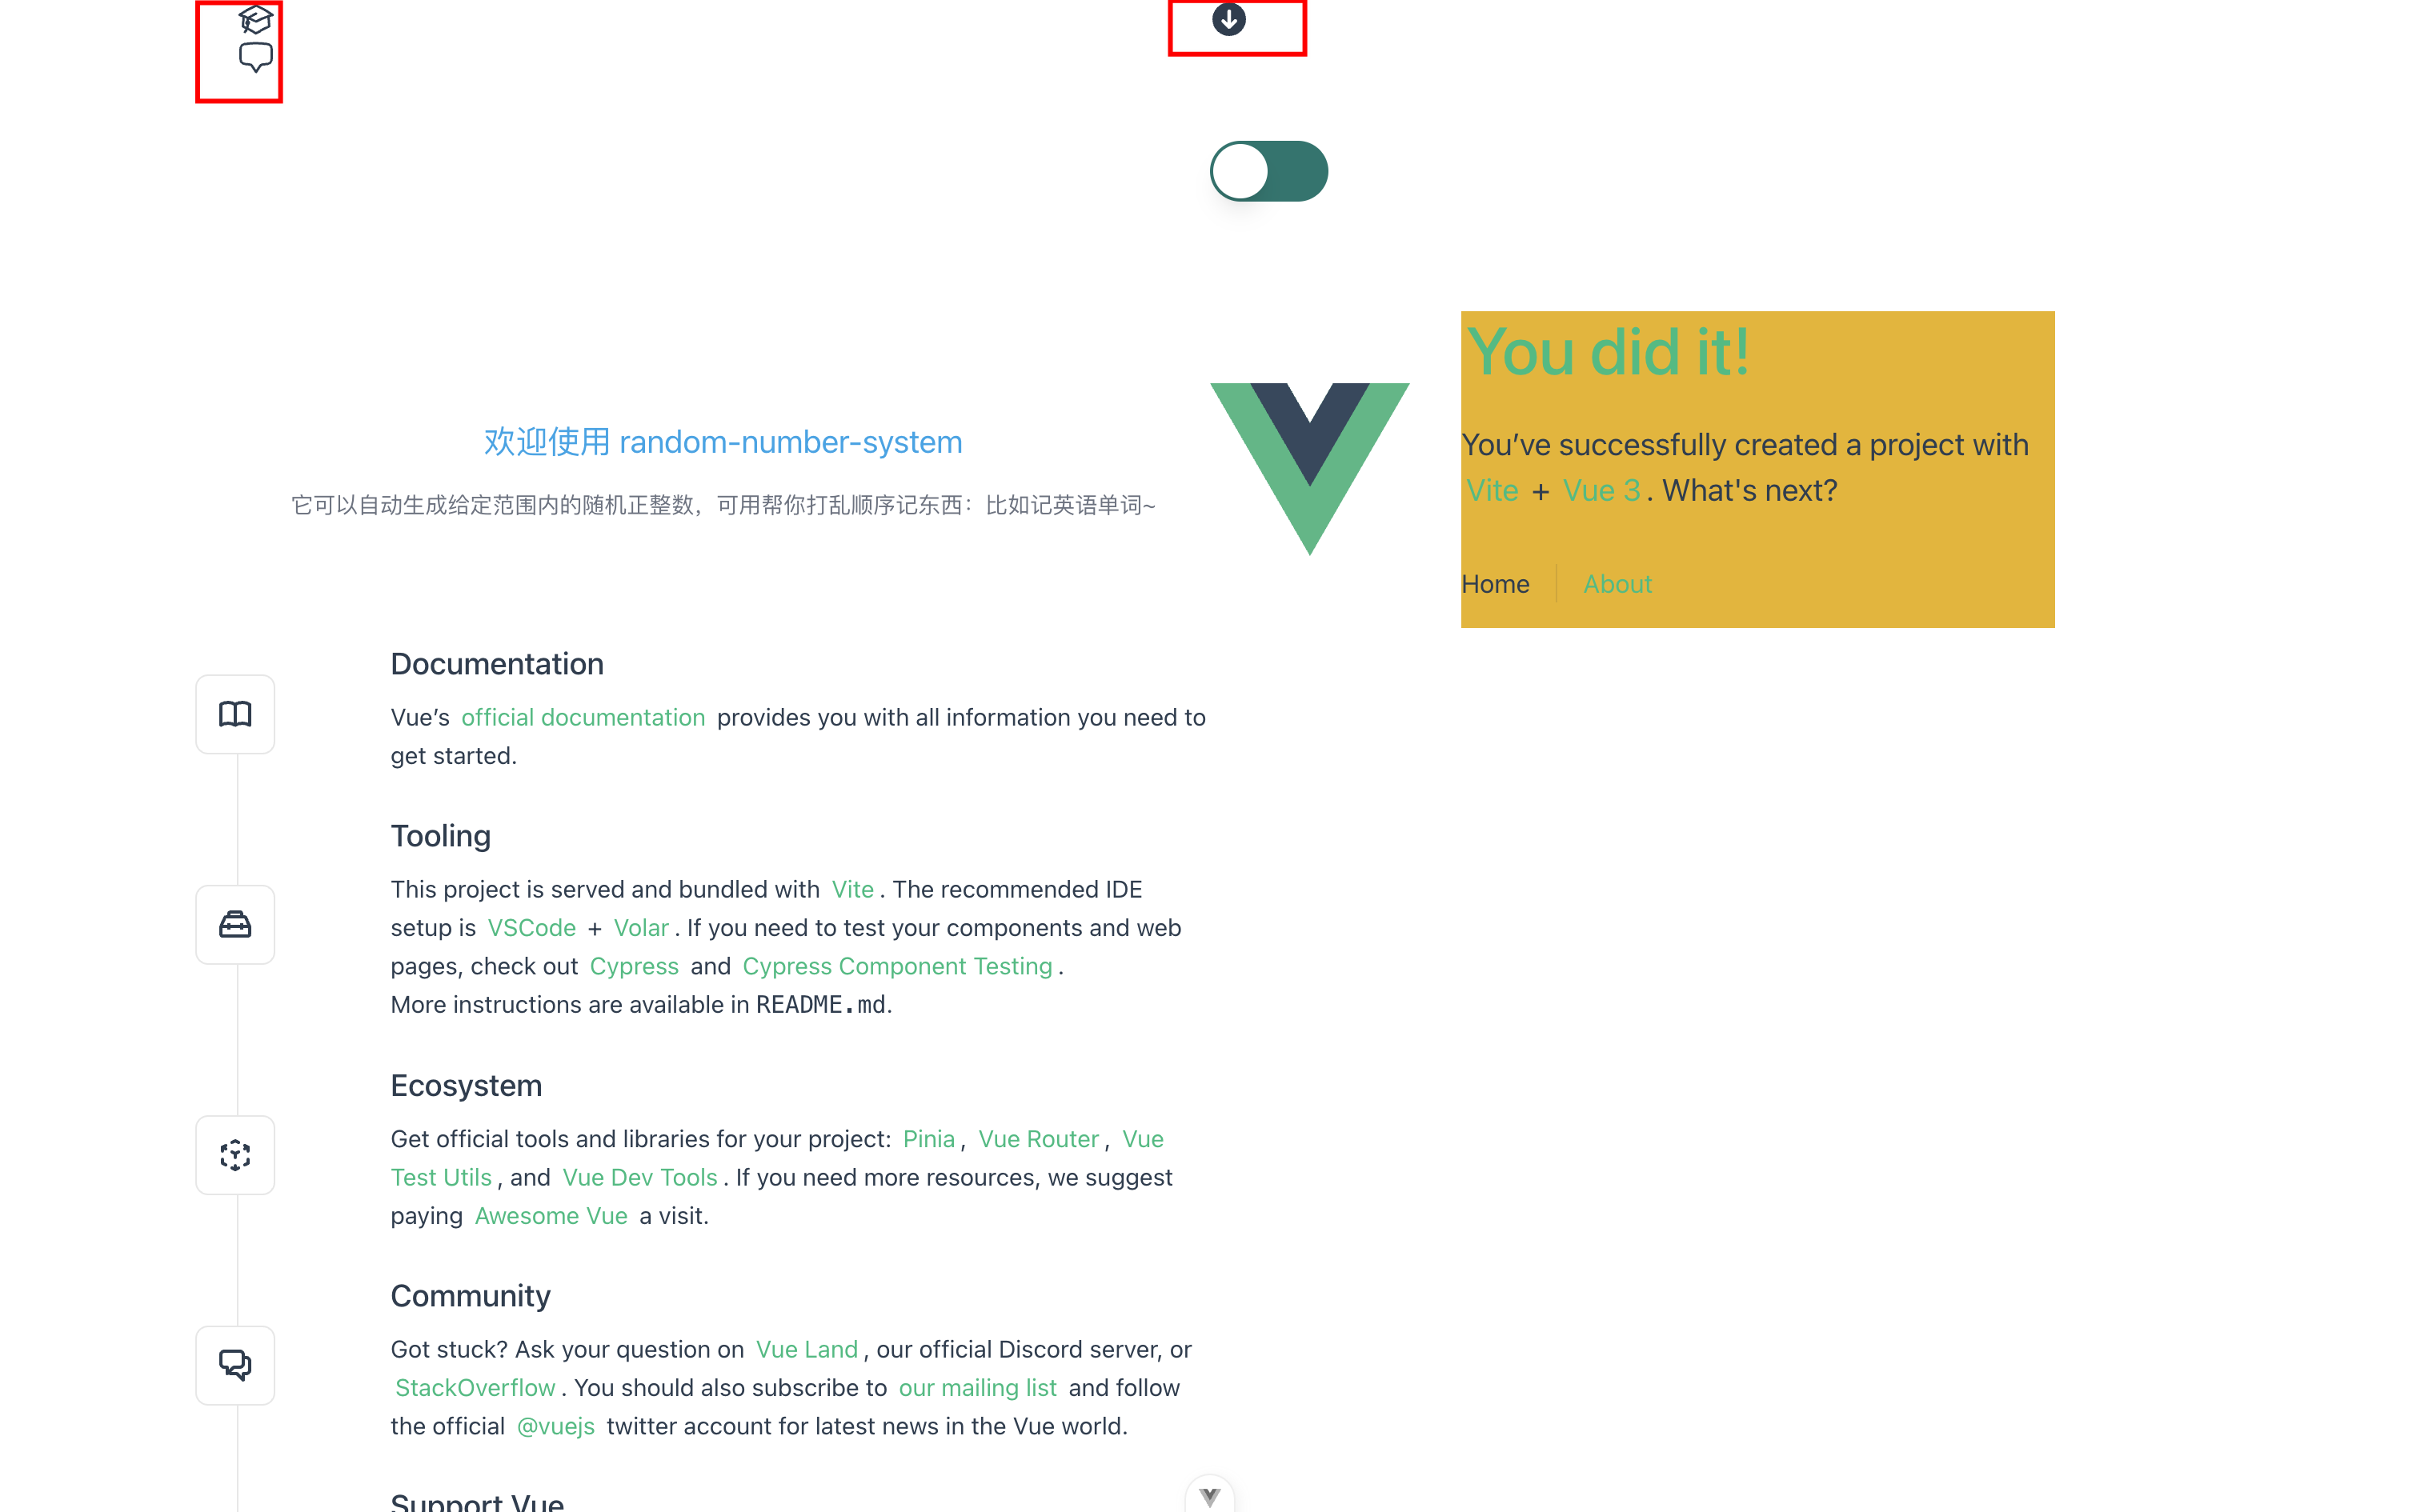
图标效果这样:
安装 Element-Plus
官方文档:安装 | Element Plus
不多说,还是习惯这种写好一大堆组件的方式,虽然会有覆盖样式的痛苦时刻,但大多时候真香
- 安装
Element-Plus依赖
1
2
3
4
5
6
7
8
9
10
| # 选择一个你喜欢的包管理器
# NPM
npm install element-plus --save
# Yarn
yarn add element-plus
# pnpm
pnpm add element-plus
|
mian.ts全局引入
App.vue内使用,验证下Elemen-Plus
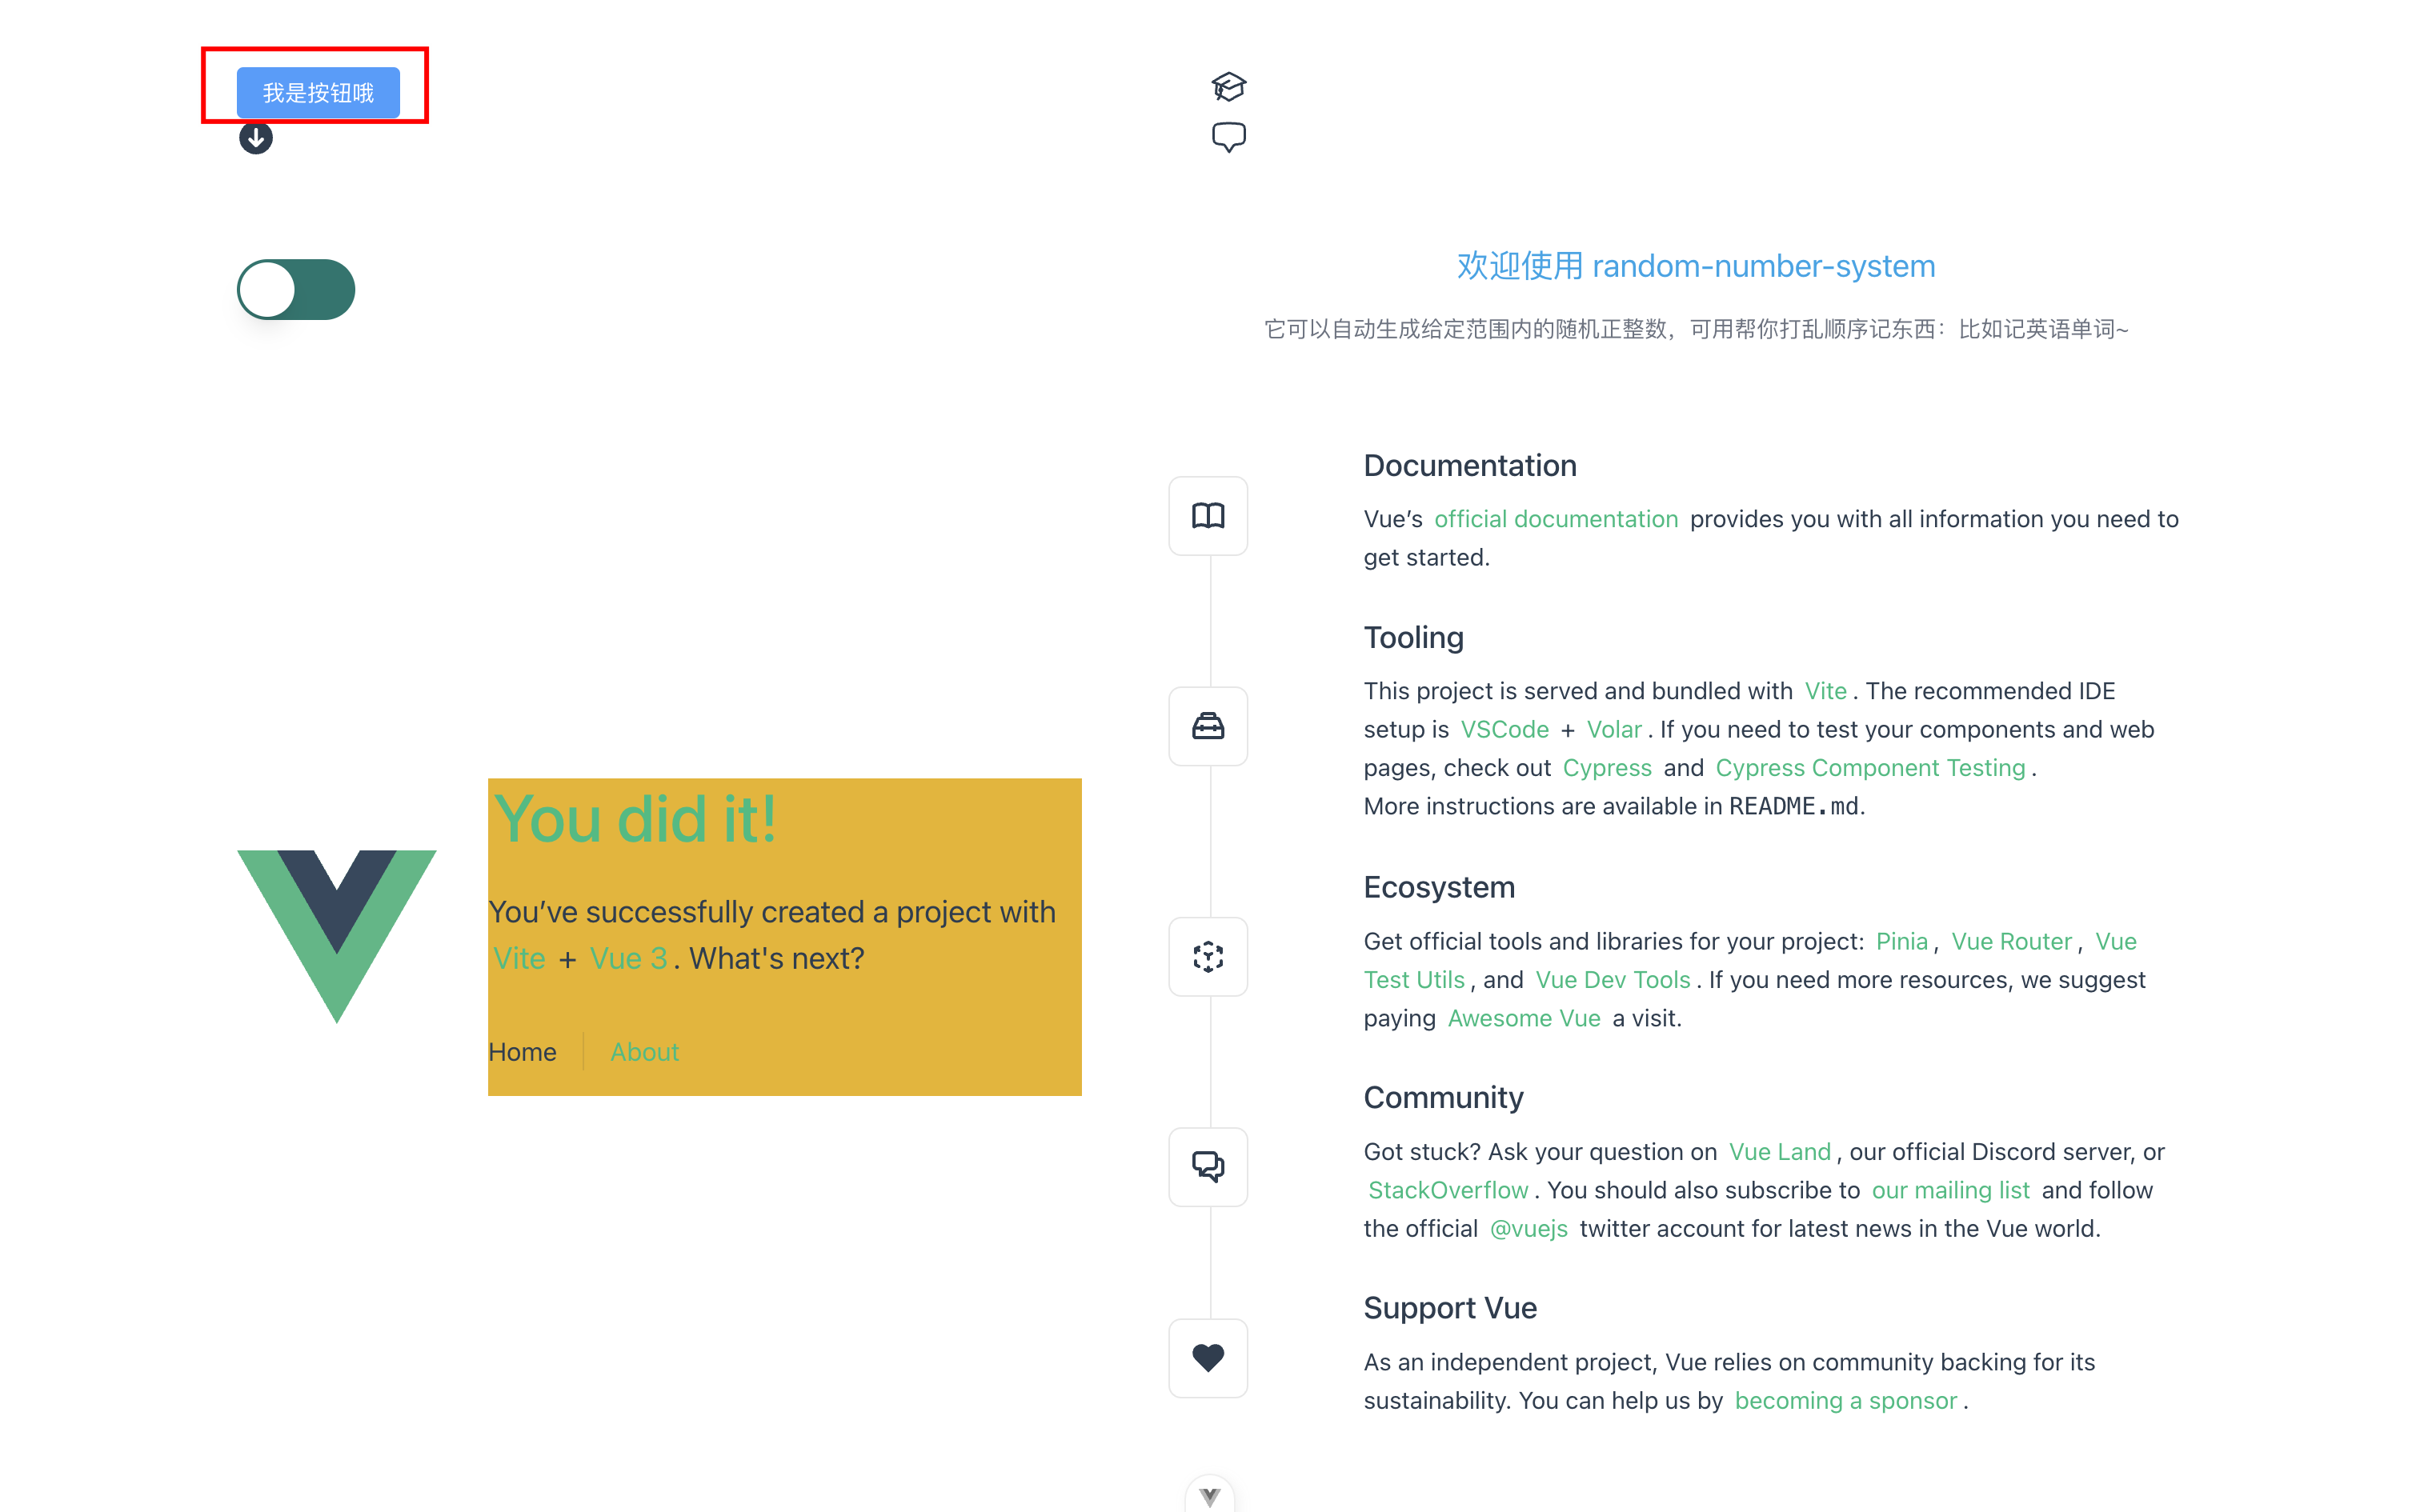
发现按钮的功能、交互、样式都是正常的
PS:若改为按需引入,会出现跟tailwindcss的配置冲突,网上处理方式很多,但最直接的就是用全局引入
最后
至此,我们的所有的基本依赖已安装验证完毕,剩下的就是写代码了。
1、对应的 demo 代码地址:vue3-vite-element-plus-tailwindcss-typescript,里面有所有的 mr
2、随机生成正整数代码地址:random-number-system,使用了上面技术进行了实战,验证了技术
使用 Github Actions + Github Pages 自动发布生成的线上网址:https://mrhzq.github.io/random-number-system/
推荐阅读:《Github Actions + Github Pages 自动发布 Vue3 + Vite 项目》